vSphere with Kubernetes – TKG Clusters
A few weeks back, I’ve created a little series about how to set up vSphere with Kubernetes in your HomeLab. At the end of the series, the Supervisor Cluster was up and running. But as you know, there is also the option to deploy a nested Kubernetes Clusters, where you have a bit more freedom in terms of configuration and flexibility. I’ve talked a bit about the pros and cons in another Post – Tanzu Kubernetes Grid Cluster vs vSphere native Pods.
Today, I gonna show how to deploy the nested K8s Cluster.
In summary, we need to create a Content Library, assign it to the Supervisor Cluster, and create the Nested TKG Cluster.
Create a Content Library
The (nested) Tanzu Kubernetes Cluster consists of VMs, which are deployed through OVA Images. These OVA images come from a Content Library, that is associated with the Supervisor Cluster.
How do the images get into Content Library in the first place ? That’s up to you. In theory you could build them yourself. But in our case, we are going to subscribe to the official VMware Content Library.
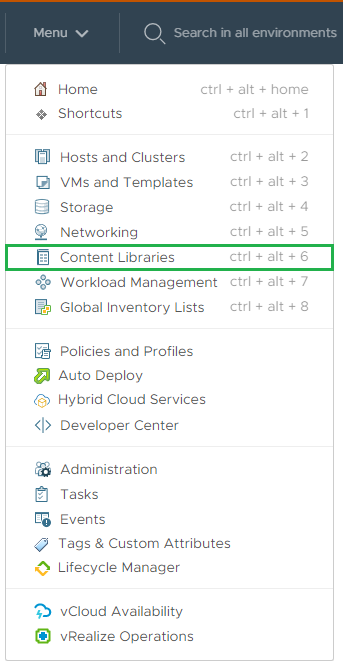
To Create a Content Library, navigate to Menu –> Content Libraries
Click Create

Give it a Name and select the vCenter with your Supervisor Cluster

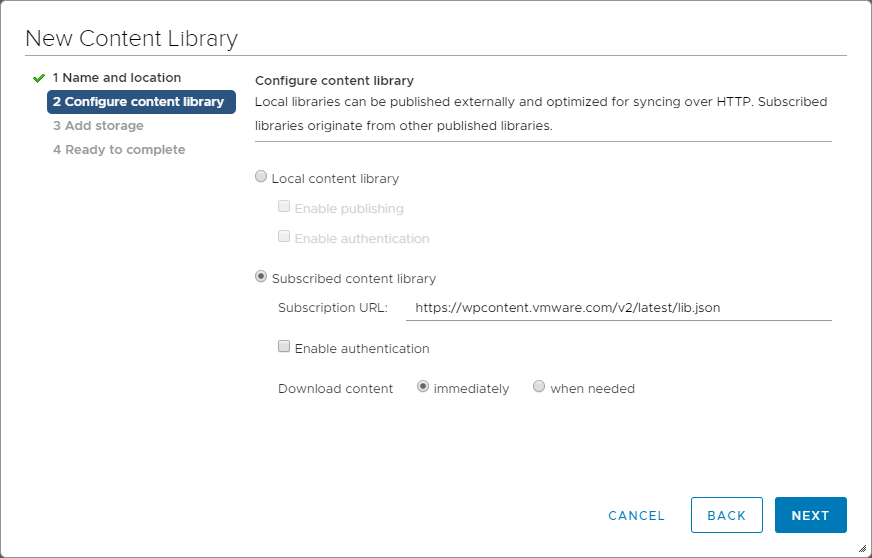
Select: Subscribed content library
Subscription URL: https://wp-content.vmware.com/v2/latest/lib.json
Download content: immediately
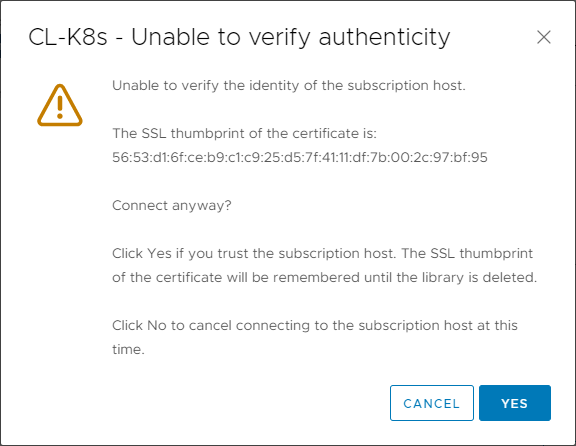
Confirm the SSL Thumbprint
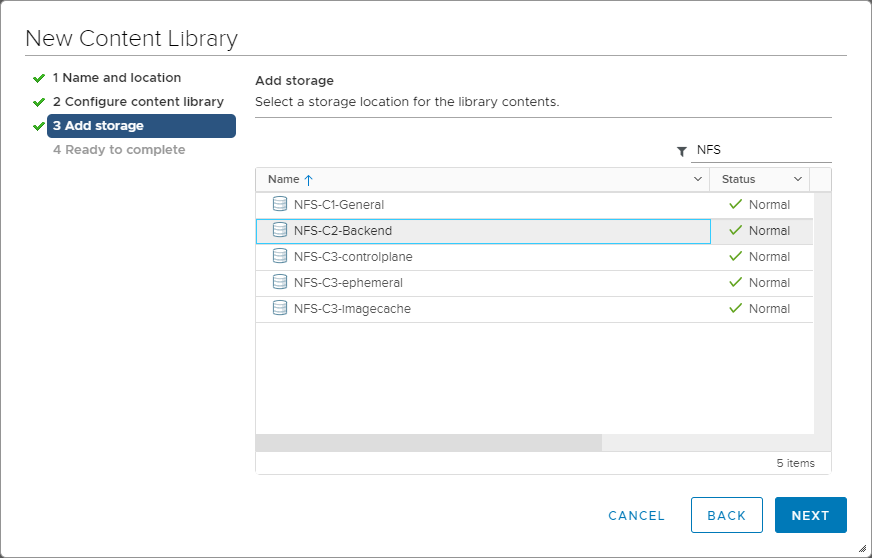
Select the Datastore, where the Content Library should save its files
Confirm the settings and click Finish
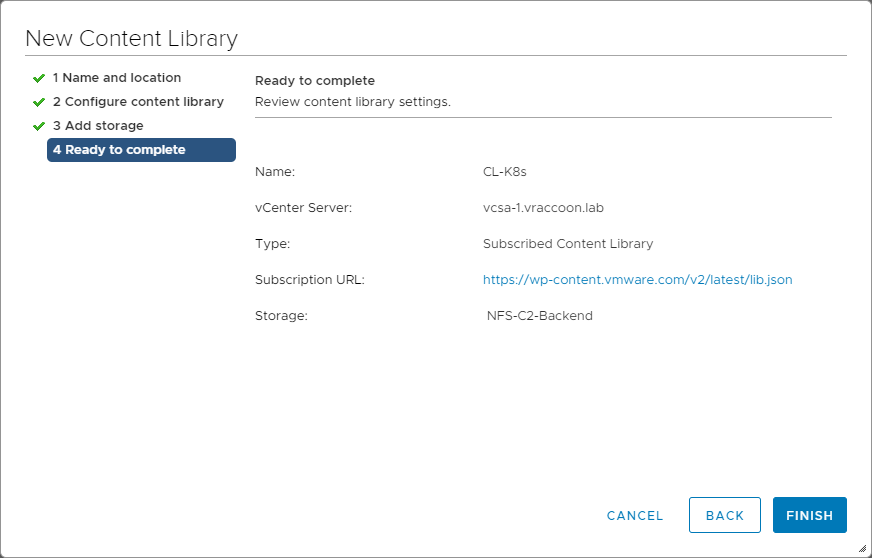
The Content Library is now created and will start downloading the OVA files from the subscribed library soon. You can check if its already done by navigating to Home –> Content Libraries –> CL-K8s (1) –> Templates (2) –> OVF & OVA Templates (3)
Here you see next to the image name, you’ll see the column Stored Locally (4). When it says Yes, the download has finished.
Btw.: you don’t have to wait for it to finish to continue.

Assign Content Library to Supervisor Cluster
Now that we have the Content Library set up, we can assign it to our Supervisor Cluster.
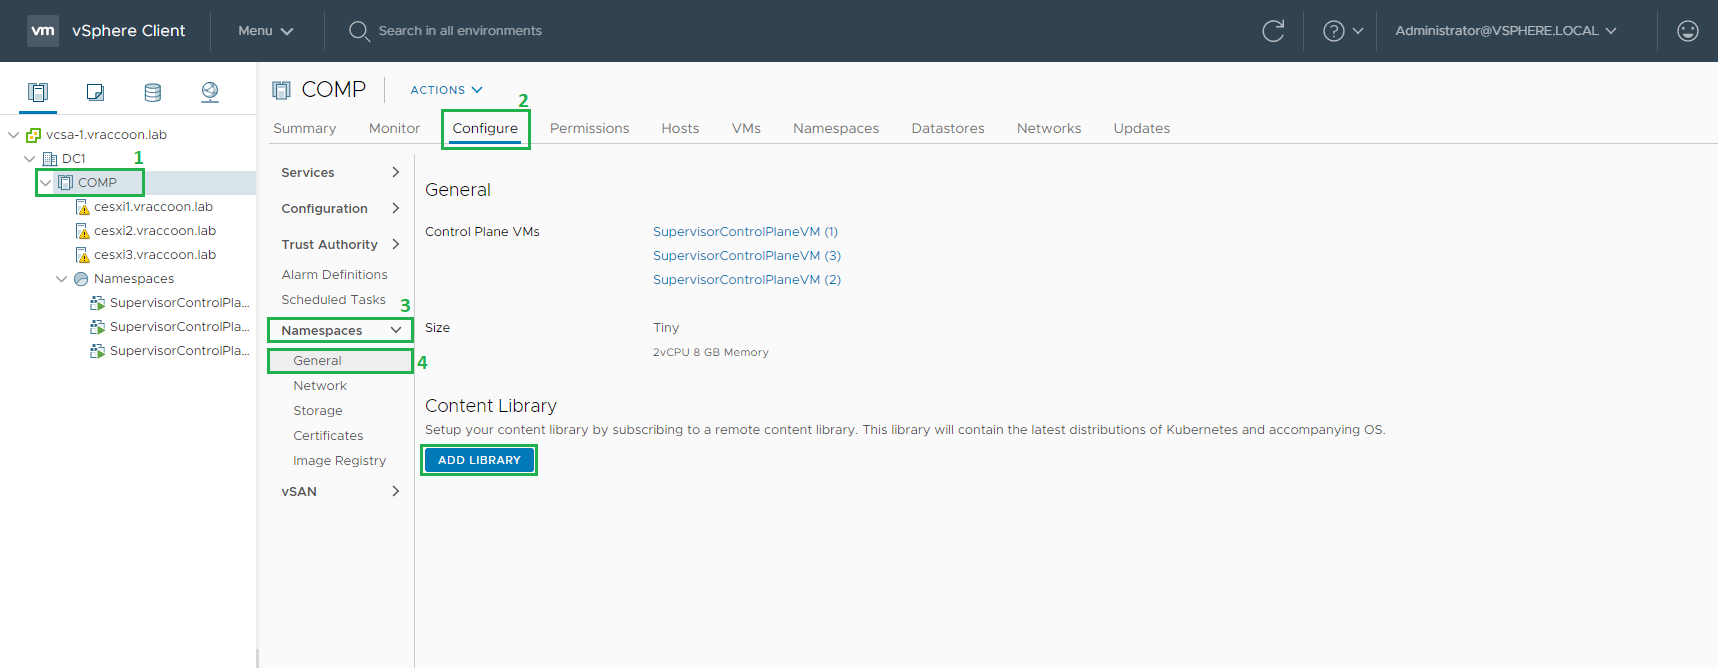
Select your vSphere Supervisor Cluster (1) –> Configure (2) –> Namespaces (3) –> ADD LIBRARY
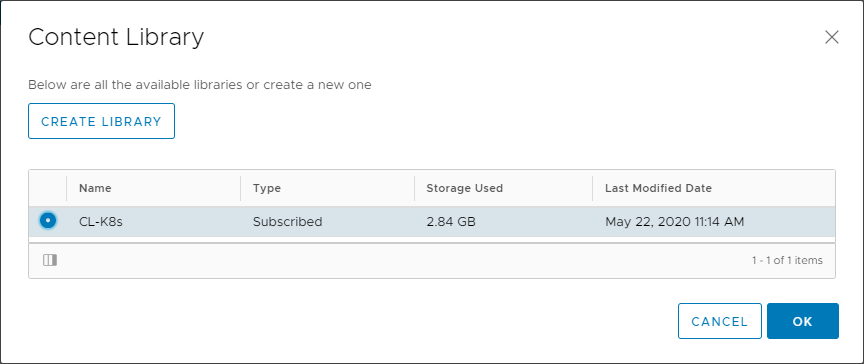
Select the previously created Content Library and click OK
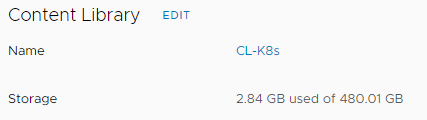
You will now see a list of added Content Libraries. In our case, its only CL-K8s, but you could add more than one.
Create the Nested TKG Cluster
Now, as we have our images ready, we can actually start creating the TKG Cluster. This will require at least one Namespace where you have edit permissions, as the TKG Cluster is going to be put into a Namespace too. This Namespace must also have a Storage Profile assigned, as this is where the VMs are going to be stored. In my case, the Namespace is called tkgclusters with Storage Profile sp-k8s-general
If you wanna know how to create the Namespace, check this post.
Login to the Supervisor Cluster via kubectl
vraccoon@ubu:~$ kubectl vsphere login --insecure-skip-tls-verify --server=https://k8s.vraccoon.lab --vsphere-username administrator@vsphere.local

Password:
Logged in successfully.

You have access to the following contexts:
   k8s.vraccoon.lab
   tkgclusters

If the context you wish to use is not in this list, you may need to try
logging in again later, or contact your cluster administrator.

To change context, use `kubectl config use-context <workload name>`
Collect some information upfront
In order to do all this magic, VMware has created a bunch of Custom Resource Definition within Kubernetes. One of which is the virtualmachineimages
These images are coming from the Content Library, we have dealt with earlier. So let’s check what we can see within K8s:
vraccoon@ubu:~$ kubectl get virtualmachineimages.vmoperator.vmware.com
NAME                                                        VERSION                          OSTYPE
ob-15957779-photon-3-k8s-v1.16.8---vmware.1-tkg.3.60d2ffd   v1.16.8+vmware.1-tkg.3.60d2ffd   vmwarePhoton64Guest
Line 3 shows us the image (ob-15957779-photon-3-k8s-v1.16.8—vmware.1-tkg.3.60d2ffd), we have downloaded earlier into the Content Library. We will need this information later.
There is one more piece of information we need to gather/verify – the Storage Class. In order to create a TKG Cluster, we need to specify the Storage Class, where it is going to be stored. So let’s see what we have available:
vraccoon@ubu:~$ kubectl get storageclasses.storage.k8s.io
NAME             PROVISIONER              RECLAIMPOLICY   VOLUMEBINDINGMODE   ALLOWVOLUMEEXPANSION   AGE
sp-k8s-general   csi.vsphere.vmware.com   Delete          Immediate           false                  9m54s
The only available Storage Class is sp-k8s-general. Not very surprising though, since I actually said it already earlier =D
But we need this information too.
Create the TKG Cluster YAML
Finally, we can create the yaml manifest for our TKG Cluster:
apiVersion: run.tanzu.vmware.com/v1alpha1
kind: TanzuKubernetesCluster
metadata:
  name: tkg-c1
  namespace: tkgclusters
spec:
  distribution:
    version: v1.16.8+vmware.1-tkg.3.60d2ffd
  topology:
    controlPlane:
      count: 1
      class: best-effort-xsmall
      storageClass: sp-k8s-general
    workers:
      count: 3
      class: best-effort-xsmall
      storageClass: sp-k8s-general
This is a very, very basic deployment file. But for the sake of simplicity, I’ve crossed out everything that’s is not absolutely mandatory. Let’s go through this:
Line 1-5: This is just standard Kubernetes stuff (even though using VMware’s CRDs).
Line 8: Here, we specify the K8s version we want to deploy. The version must be available through the Content Library. Version shortcuts are supported. Coming back to the virtualmachineimage we’ve investigated earlier, which was called ob-15957779-photon-3-k8s-v1.16.8—vmware.1-tkg.3.60d2ffd
To reference this, you could use either of the following as version parameter:
- Fully qualified version: v1.16.8—vmware.1-tkg.3.60d2ffd
- Version + Patch shortcut: v1.16.8 (in this case, the latest image available in the Content Library with that version and patch will be used, identified by the hash at the very end of the name)
- Version shortcut: v1.16 (in this case, the image with the latest patch would be used)
Line 11: Number of K8s Masters to be deployed (only 1 or 3 are supported)
Line 12 & 16: The virtual Machine class to be used. You can think of this as a T-Shirt size for your VMs. In my case I’m using best-effort-xsmall, which is 2vCPUs and 2GB Memory, without reservations.
If you want to know what other classes are available and what their specs are, you can run kubectl get virtualmachineclasses -o yaml
Lines 13 & 17: The Storage Class (and therefore the StoragePolicy/Datastore) where the VMs will be stored. We have checked the available StorageClasses earlier.
Our basic TKG deployment yaml is ready. I’ve saved it to tkg-c1.yaml so let’s deploy it!
vraccoon@ubu:~$ kubectl create -f tkg-c1.yaml
tanzukubernetescluster.run.tanzu.vmware.com/tkg-c1 created
You can check the progress by running:
vraccoon@ubu:~$ kubectl get tanzukubernetesclusters.run.tanzu.vmware.com
NAME     CONTROL PLANE   WORKER   DISTRIBUTION                     AGE   PHASE
tkg-c1   1               3        v1.16.8+vmware.1-tkg.3.60d2ffd   80s   creating
Or to get more details:
vraccoon@ubu:~$ kubectl describe tanzukubernetesclusters.run.tanzu.vmware.com tkg-c1
Name:         tkg-c1
Namespace:    tkgclusters
Labels:       <none>
Annotations:  <none>
API Version:  run.tanzu.vmware.com/v1alpha1
Kind:         TanzuKubernetesCluster
Metadata:
  Creation Timestamp:  2020-05-22T12:53:58Z
  Finalizers:
    tanzukubernetescluster.run.tanzu.vmware.com
  Generation:        1
  Resource Version:  34995
  Self Link:         /apis/run.tanzu.vmware.com/v1alpha1/namespaces/tkgclusters/tanzukubernetesclusters/tkg-c1
  UID:               3e6ca35a-09ca-4237-b7dc-5bbe268e4520
Spec:
  Distribution:
    Full Version:  v1.16.8+vmware.1-tkg.3.60d2ffd
    Version:       v1.16.8+vmware.1-tkg.3.60d2ffd
  Settings:
    Network:
      Cni:
        Name:  calico
      Pods:
        Cidr Blocks:
          192.168.0.0/16
      Service Domain:  cluster.local
      Services:
        Cidr Blocks:
          10.96.0.0/12
  Topology:
    Control Plane:
      Class:          best-effort-xsmall
      Count:          1
      Storage Class:  sp-k8s-general
    Workers:
      Class:          best-effort-xsmall
      Count:          3
      Storage Class:  sp-k8s-general
Status:
  Addons:
    Authsvc:
      Name:
      Status:  pending
    Cloudprovider:
      Name:
      Status:  pending
    Cni:
      Name:
      Status:  pending
    Csi:
      Name:
      Status:  pending
    Dns:
      Name:
      Status:  pending
    Proxy:
      Name:
      Status:  pending
    Psp:
      Name:
      Status:  pending
  Cluster API Status:
    API Endpoints:
      Host:  172.31.60.194
      Port:  6443
    Phase:   provisioned
  Node Status:
    tkg-c1-control-plane-2dqhn:             pending
    tkg-c1-workers-n9ggp-57ff794c46-47lpj:  pending
    tkg-c1-workers-n9ggp-57ff794c46-cdw79:  pending
    tkg-c1-workers-n9ggp-57ff794c46-rqcqg:  pending
  Phase:                                    creating
  Vm Status:
    tkg-c1-control-plane-2dqhn:             pending
    tkg-c1-workers-n9ggp-57ff794c46-47lpj:  pending
    tkg-c1-workers-n9ggp-57ff794c46-cdw79:  pending
    tkg-c1-workers-n9ggp-57ff794c46-rqcqg:  pending
Events:                                     <none>
Depending on the size of your Cluster, it will be up and running after a few minutes:
vraccoon@ubu:~$ kubectl get tanzukubernetesclusters.run.tanzu.vmware.com
NAME     CONTROL PLANE   WORKER   DISTRIBUTION                     AGE   PHASE
tkg-c1   1               3        v1.16.8+vmware.1-tkg.3.60d2ffd   11m   running
Test the TKG Cluster
Logging in to the TKG Cluster is very similar to log in to the Supervisor Cluster:
vraccoon@ubu:~$ kubectl vsphere login --insecure-skip-tls-verify --server=https://k8s.vraccoon.lab --vsphere-username administrator@vsphere.local --tanzu-kubernetes-cluster-name tkg-c1

Password:
WARN[0003] Tanzu Kubernetes cluster login: no namespace given, name (tkg-c1) may be ambiguous
Logged in successfully.

You have access to the following contexts:
   k8s.vraccoon.lab
   tkg-c1
   tkgclusters

If the context you wish to use is not in this list, you may need to try
logging in again later, or contact your cluster administrator.

To change context, use `kubectl config use-context <workload name>`
vraccoon@ubu:~$ kubectl config get-contexts
CURRENT   NAME               CLUSTER            AUTHINFO                                           NAMESPACE
          k8s.vraccoon.lab   k8s.vraccoon.lab   wcp:k8s.vraccoon.lab:administrator@vsphere.local
*         tkg-c1             172.31.60.194      wcp:172.31.60.194:administrator@vsphere.local
          tkgclusters        172.31.60.193      wcp:172.31.60.193:administrator@vsphere.local      tkgclusters
As you can see, I’m successfully logged in the nested cluster. And even though I’ve also access to the parent Namespace (tkgcluster), the context is already set to the TKG Cluster.
We could now continue with deploying some workloads.
Closing Words
I’ve demonstrated how easy it is to create a nested Tanzu Kubernetes Grid Cluster within the Supervisor Cluster. Though we’ve only touched some of the basics of the specs. There is a lot more you could configure, a big part would be the CNI (which, by default is Calico, which is also the only supported CNI as of now).
Speaking of networking, NSX-T is also providing its magic to the TKG Clusters. For example, if I where to deploy a LoadBalancer Service in the cluster I’ve just created, this LoadBalancer would be provided by NSX-T automatically.
If you want to know more about possible config options check the official documentation page