Replace NSX-T 3 SSL / TLS Certificates – GUI Method
Just rolling out NSX-T is pretty simple. Deploy OVA –> Next –> Next –> Finish. Done! Ready to use!
This approach is pretty sufficient if we are talking about HomeLabs, POCs, or similar. But if you wanna set it up in an enterprise manner there are more things to consider, which we usually not bother ourselves with, in test deployments.
One of those things are SSL/TLS Certificates. Due to the many different standards and the sometimes poor documentation, it can be tricky to get the custom certificates implemented.
This is the firstpost out of a small series about replacing NSX-T SSL / TLS Certificates:
- –> Replace NSX-T 3 SSL / TLS Certificates – GUI Method
- Replace NSX-T 3 SSL / TLS Certificates – Manual Method
- Replace NSX-T 3 SSL / TLS Certificates – Cluster Certificate
- Replace NSX-T 3 SSL / TLS Certificates – Common errors
Generate a custom signed certificate through the NSX GUI
NSX-T actually provides a quite handy way to create the Certificate Signing Request (CSR) through the GUI. The issue with that is, that it doesn’t contain a Subject Alternate Name (SAN), thus causing Google Chrome to still complain about an insecure connection.
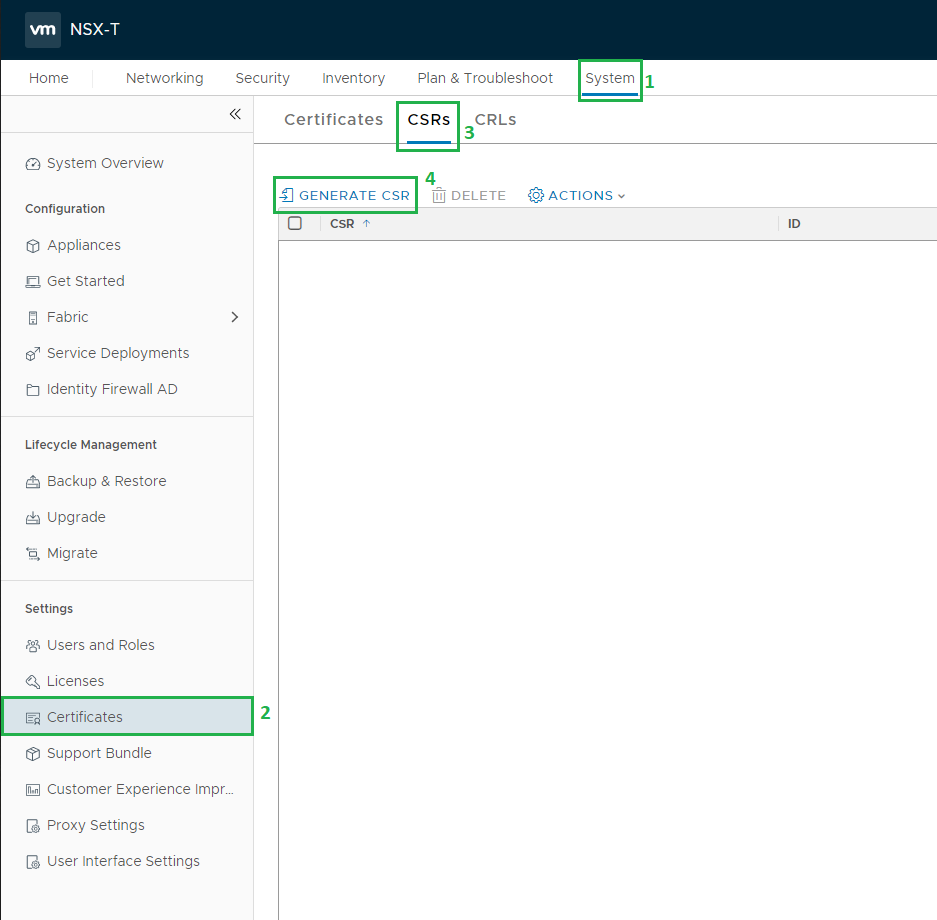
To create the Certificate Signing Request (CSR) log in to your NSX-T Manager and navigate to System (1) –> Certificates (2) –> CSRs (3) –> GENERATE CSR (4)
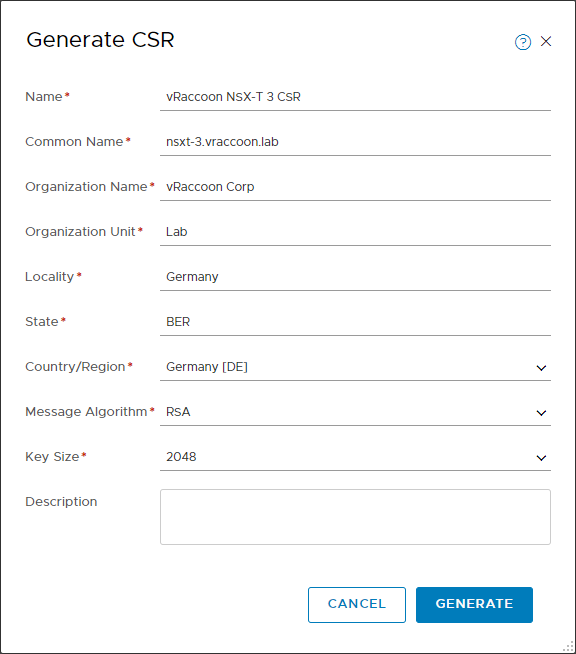
Fill out the newly opened form.
Name: <displayName> (it actually doesn’t matter much what you enter, it just how this CSR is called within NSX-T
Common Name: <MANAGER FQDN>
The rest is pretty straight forward. Click Generate, when done.
This step has not only created the CSR but also the private key, which is kept at the NSX-T Manager.
To download, Select the CSR –> Actions (1) –> Download CSR PEM (2)
Alternatively, you can just click the CSR and you will see the content.

You can now use this CSR and request the certificate at the Certificate Authority of your choice. In my case, I’m using my Windows Certificate Authorty.
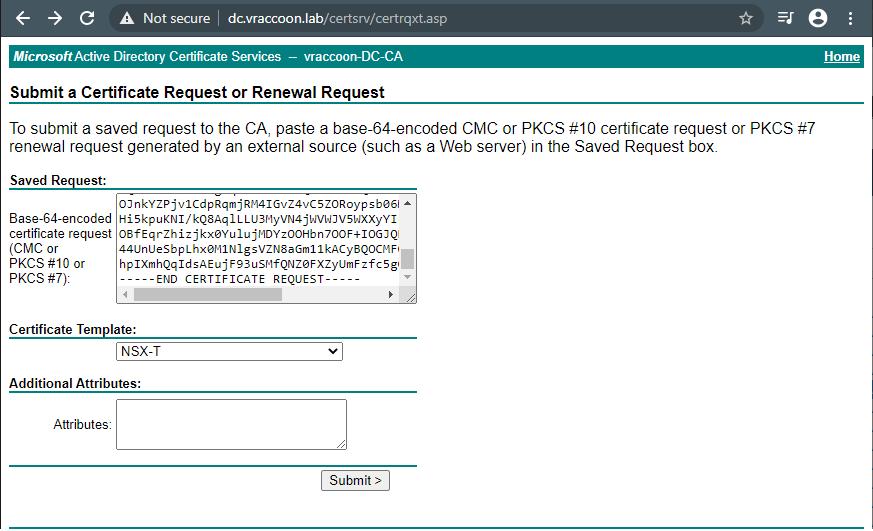
Note: You need to have Basic Constraints enabled in the certificate.
In my case, I’m using the WebServer Certificate Template with the following modification:
- Compatibility Settings
- Certification Authority: Windows Server 2008 R2
- Certificate recipient: Windows 7 / Server 2008 R2
- Extensions
- Enable Basic Constraints
These are the minimal compatibility settings in order to even have the feature Basic Constraints available.
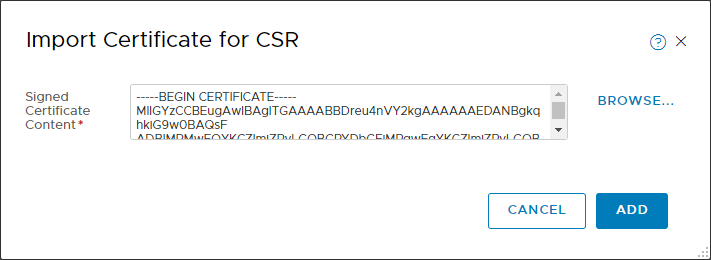
If you got your signed Certificate, go back to your NSX-T Manager and the page with the CSR.
Select the CSR –> Action (1) –> Import Certificate for CSR

Copy the full certificate chain into the textbox in the following manner:
—–BEGIN CERTIFICATE—–
NSX Certificate
—–END CERTIFICATE—–
—–BEGIN CERTIFICATE—–
CA Certificate
—–END CERTIFICATE—–
Also Add Intermediate Certificates in the Path, if you happen to have some. Click ADD.
If successful, you will get a message, that the CSR is fulfilled.
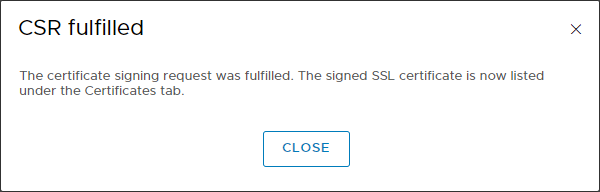
You will also notice, that entry for the CSR is gone.
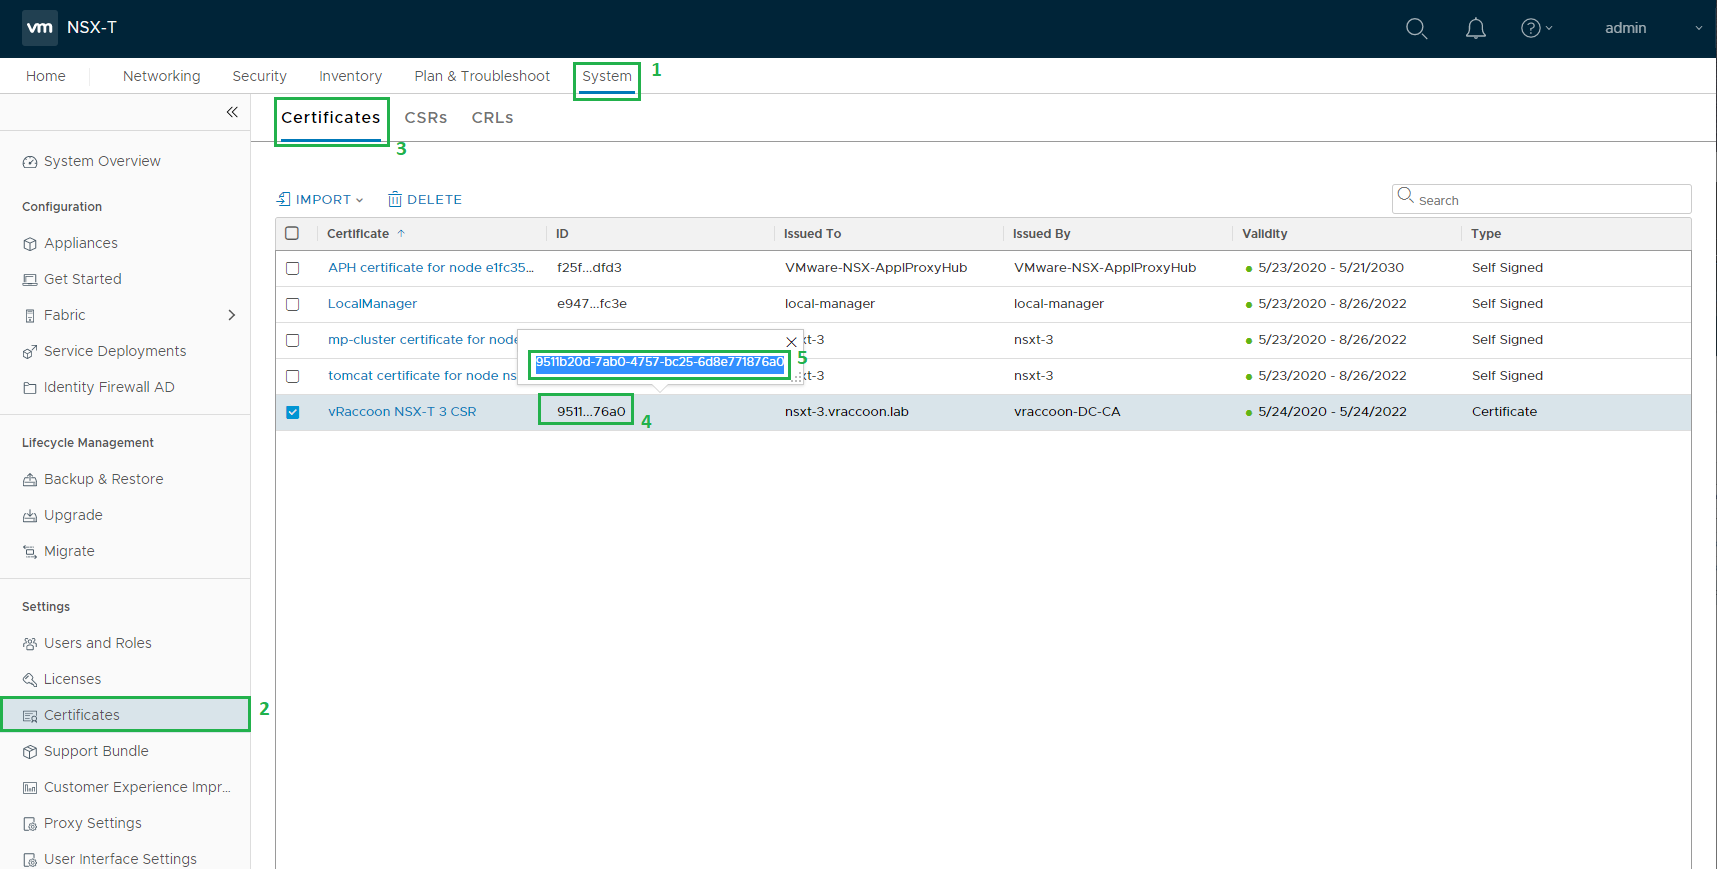
Next we have to take a note of the Certificate’s ID, navigate to System (1) –> Certificates (2) –> Certificates (3) –> Look for the Cert (4) –> Click the ID (5) –> Copy it (6)
Now as we have the certificate available, we can enable it for the NSX-T Manager. This can only be done through the REST API. I’m going to use curl to do so.
We need to run the following command:
curl –insecure -u <user>:<password> -X POST “https://<nsx_manager>/api/v1/node/services/http?action=apply_certificate&certificate_id=<certificateID>
In my case:
vraccoon@ubu:~$ curl --insecure -u admin:'SuperSecret123' -X POST "https://nsxt-3.vraccoon.lab/api/v1/node/services/http?action=apply_certificate&certificate_id=9511b20d-7ab0-4757-bc25-6d8e771876a0"
vraccoon@ubu:~$
If you don’t get any response, it is usually a good sign 🙂
Just reboot the NSX-T Manager and the new Certificate will be used.
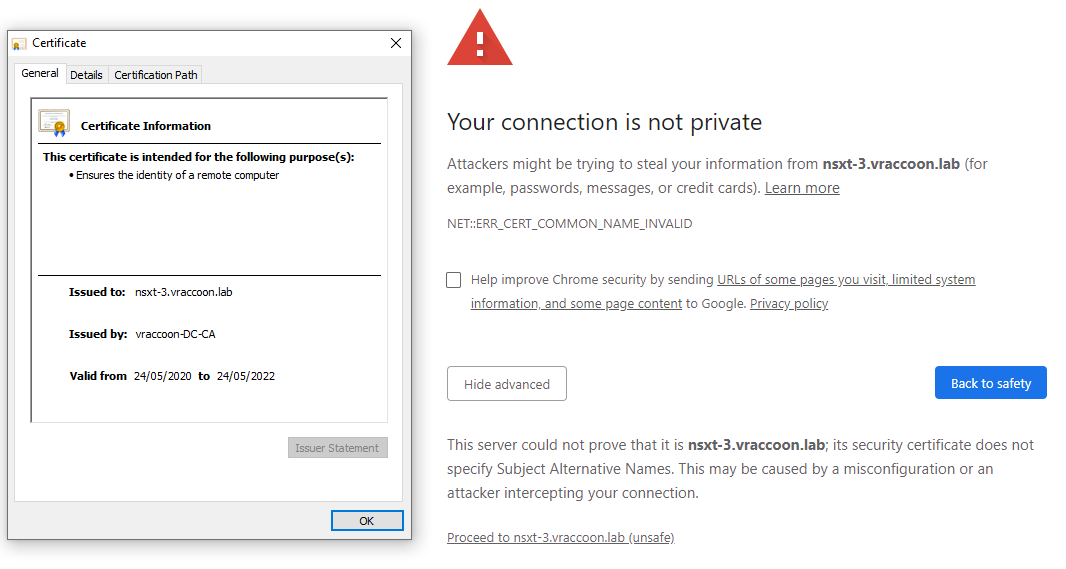
After rebooting, browse to your NSX-T Manager. You’ll see that the Certificate is beeing used. But in case, you are using Google Chrome, you will still get an error about an insecure connection.
To fix this, check out my next Post: Replace NSX-T 3 SSL Certificates – Manual Method
One Reply to “Replace NSX-T 3 SSL / TLS Certificates – GUI Method”