Replace NSX-T 3 SSL / TLS Certificates – Manual Method
This is the second post out of a small series about replacing NSX-T SSL / TLS Certificates:
- Replace NSX-T 3 SSL / TLS Certificates – GUI Method
- –> Replace NSX-T 3 SSL / TLS Certificates – Manual Method
- Replace NSX-T 3 SSL / TLS Certificates – Cluster Certificate
- Replace NSX-T 3 SSL / TLS Certificates – Common errors
In my last post, I’ve described how to replace the NSX-T Manager Certificate, using the NSX-T Manager GUI. It’s actually quite easy, but it has a huge drawback – for some reason, there is no Subject Alternative Name (SAN) included in the Certificate Signing Request (CSR), thus Google Chrome (VMwares recommended Browser) will still throw an error about an insecure connection.
In order to fix this, we have to create the CSR manually through openssl, cfssl, or a similar tool.
Create private Key and CSR
First, we need to create a config (nsxt-3.cnf) file for our CSR:
[ req ]
default_bits = 2048
distinguished_name = req_distinguished_name
req_extensions = req_ext
prompt = no
[ req_distinguished_name ]
countryName = DE
stateOrProvinceName = Germany
localityName = BER
organizationName = vRaccoon Corp
organizationalUnitName = LAB
commonName = nsxt-3.vraccoon.lab
[ req_ext ]
subjectAltName = @alt_names
[alt_names]
DNS.1 = nsxt-3.vraccoon.lab
When done, run the following command:
openssl req -nodes -newkey rsa:2048 -keyout nsxt-3.key -config nsxt-3.cnf -out nsxt-3.csr
You will now have three files:
- nsxt-3.cnf
- nsxt-3.csr
- nsxt-3.key
Get the signed Certificate
Take the nsxt-3.csr file to your Certificate Authority and get it signed. In my case, I’m using my Windows CA.
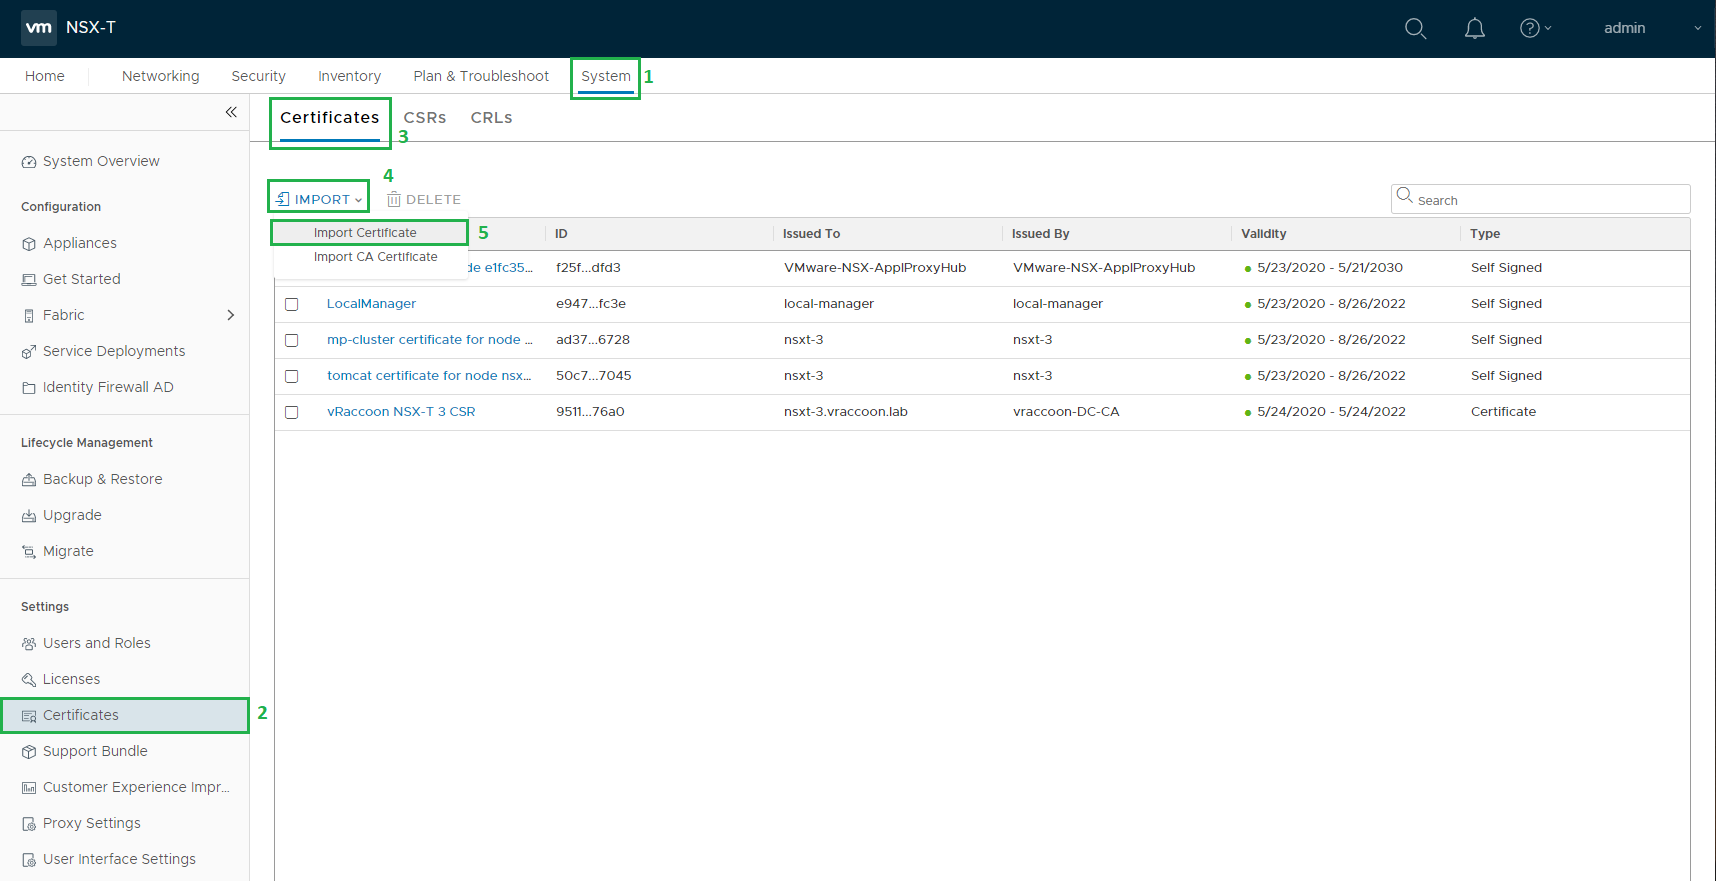
Import the Certificate into NSX-T Manager
As soon as you got your certificate back, you can import it into your NSX-T Manager. To do so, after logging in, navigate to System (1) –> Certificates (2) –> Certificates (3) –> Import (4) –> Import Certificate (5)
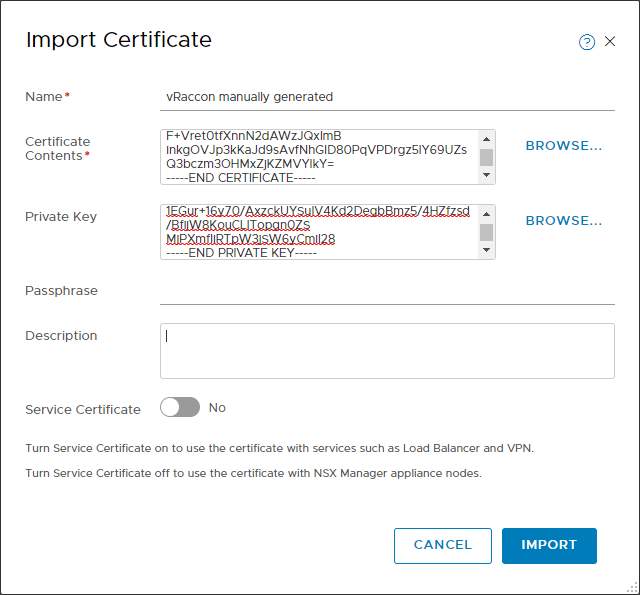
Copy the the required information into the form.
Certificate Contents: Full certificate chain in the following manner:
—–BEGIN CERTIFICATE—–
NSX-T Manager cert
—–END CERTIFICATE—–
—–BEGIN CERTIFICATE—–
Intermediate CA Cert
—–END CERTIFICATE—–
—–BEGIN CERTIFICATE—–
Root CA Cert
—–END CERTIFICATE—–
Private Key: content of the nsxt-3.key file
Passphrase: <passphrase> (if you have set one during creation of the key, otherwise, leave it empty)
Service Certificate: No
Activate the Certificate
Now as we have the certificate available, we can enable it for the NSX-T Manager.
First, make a note of the certificate ID:
System (1) –> Certificates (2) –> Certificates (3) –> Look for the Cert (4) –> Click the ID (5) –> Copy it (6)

The activation can only be done through the REST API. I’m going to use curl to do so.
We need to run the following command:
curl -k -u <user>:<password> -X POST “https://<nsx_manager>/api/v1/node/services/http?action=apply_certificate&certificate_id=<certificateID>”
In my case:
vraccoon@ubu:~$ curl --insecure -u admin:'SuperSecret123' -X POST "https://nsxt-3.vraccoon.lab/api/v1/node/services/http?action=apply_certificate&certificate_id=9511b20d-7ab0-4757-bc25-6d8e771876a0"
vraccoon@ubu:~$
If you don’t get any response, it is usually a good sign 🙂
Just reboot the NSX-T Manager and the new Certificate will be used.
After rebooting, we can see that Chrome now treats the connection as secure. We can also see that our Certificate contains the Subject Alternative Name.
Next up – Replace NSX-T 3 SSL / TLS Certificates – Cluster Certificate
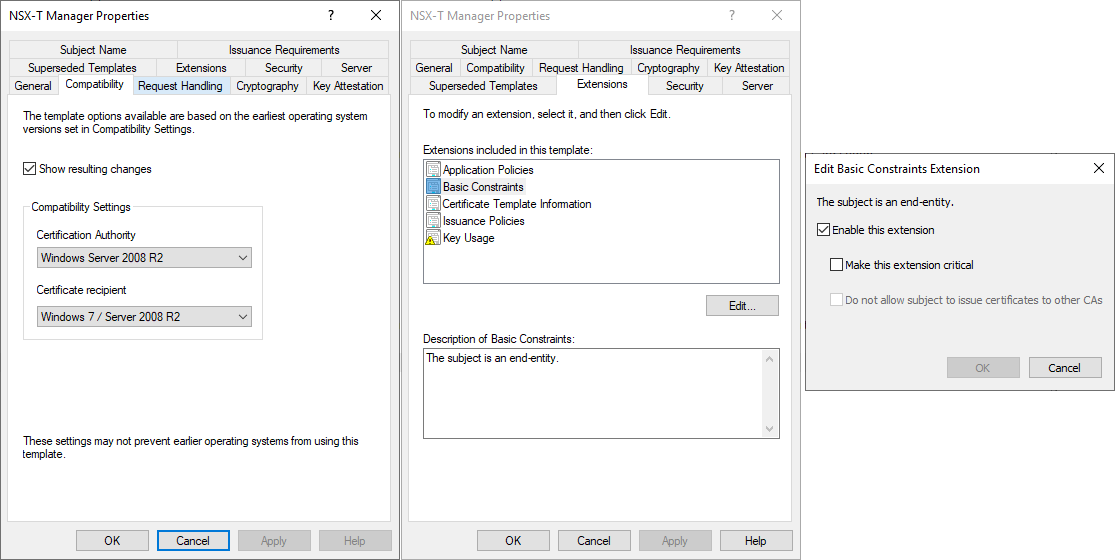
I am getting a different error which is odd
Certificate is not compliant as certificate of type SERVER: Extended key usage field not present in the certificate.”,
When I generate the cert using macOS and import it and the key into the manager and try to assign the cluster to it. I got the other error first but can’t find info on this one but it indicates there is something missing in the cert template itself.
Hey Chris,
I dont know about macOS, I’m probably one of the three persons on earth, that never really touched a MAC 😉
Though I agree, it seems there is something odd with the cert config file or template.
Maybe the extension section within your certificate indicates something.
You can use openssl to check it with:
openssl x509 -noout -text -in certFile.cer
Below the acutal public key, it lists the extensions (starting with “X509v3 extensions:”).