Create a VM via Tanzu SupervisorCluster with VM Services
Introduction
Kubernetes is evolving more and more to the central point of operation for the DataCenter.
Since K8s is designed to be extendable, there are already a ton of extensions out there, for almost everything you can imagine. The only challenge is to identify the ones needed and know how to implement/use them.
But with all the hype around Kubernetes, we should not forget our “legacy” infrastructure, namely Virtual Machines. VMs are not only just still around they are also still vital for a lot of businesses. In my opinion, it will take quite some time to get rid of them, if at all. They might become the “next Mainframe” a piece of technology that has been declared dead for a long time.
In consequence, we have to deal with both worlds simultaneously and without expanding the existing operations team. This is exactly the issue VMware vSphere with Tanzu has been addressing from the very beginning. And now, with vSphere 7.0 Update 2a, they took another big step towards this goal by introducing VM Services.
With VM Services, you can basically deploy your Virtual Machines via Kubernetes (Supervisor Cluster). Now, some might say that’s nothing new, we did this with different kinds of vm-operators or CAPI before. And this is somehow true. But with vSphere with Tanzu, this functionality comes just out of the box. I don’t wanna say there is no knowledge needed, but since it comes ready to consume, you don’t have to worry about how it works under the hood or how to install this functionality into K8s.
In this post, I want to demonstrate, how easy it is to roll out a VM via K8s and make it accessible. In theory, you could use cloud-init afterward, which opens another huge area of possibilities. I might cover this in another post. Let’s get started.
Preparation
I’m using a vSphere with Tanzu installation with NSX-T. But you can do the very same procedure with either AVI ALB or HAProxy too. There is only a small difference in the network section, which I’ll highlight later.
Content Library
We need to create a Content Library, which stores the Images we want to use for our VMs.
At the time of writing this post, it is not supported to use our own, custom images. This is because, the whole functionality is fairly new (v1alpha1). Instead, VMware provides two different images within the VMware Marketplace.
The idea is, to release this whole functionality early and then add more and more features to it as you go. Just as expected in the cloud native world (instead of doing bulk releases only once a year).
Create Content Library
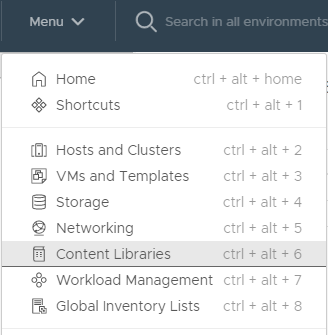
Navigate to Menu –> Content Libraries
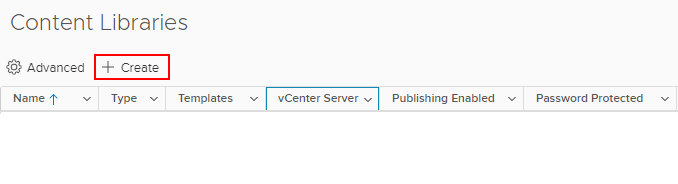
Click Create
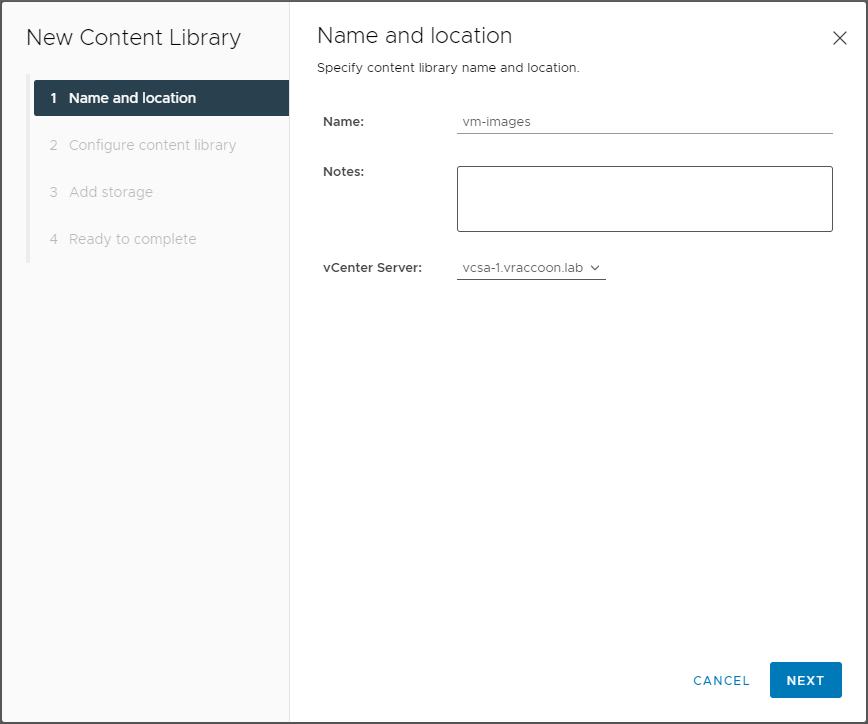
I call my Content Library “vm-images”. Make sure, you selected the correct vCenter Server and hit NEXT.
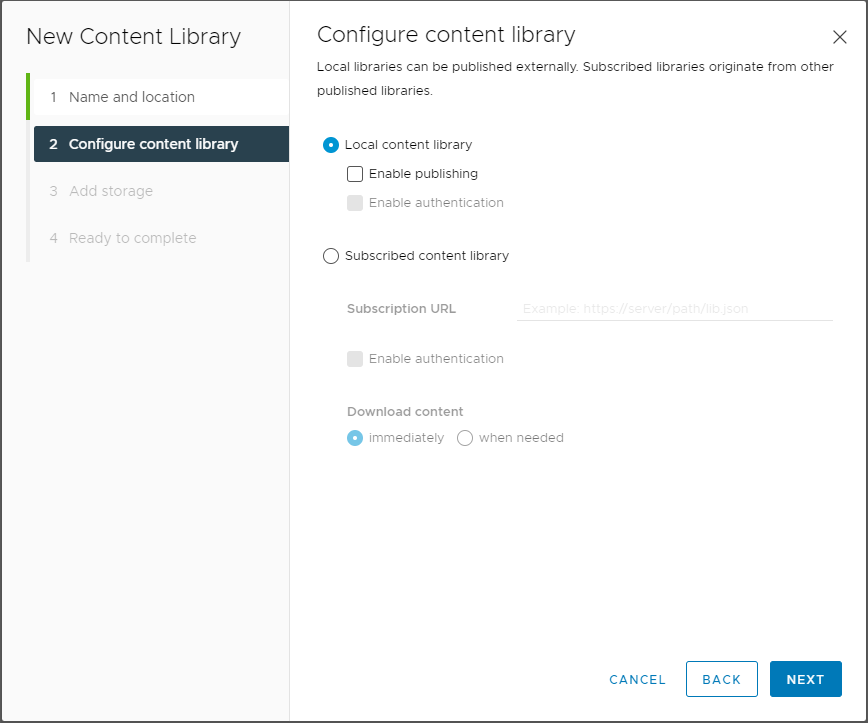
Leave it as “Local content library” and hit NEXT.
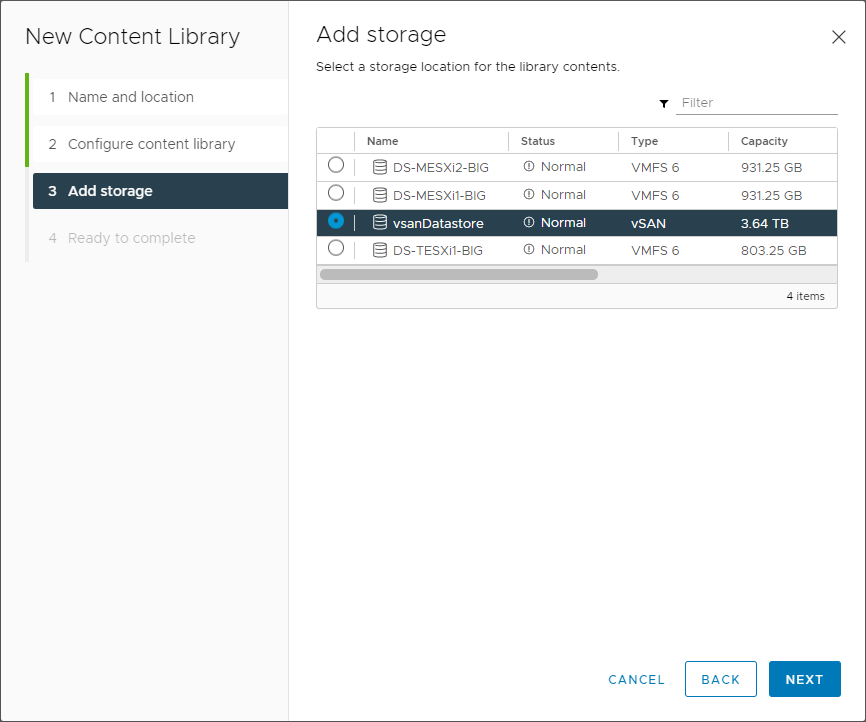
Select the Datastore, where the Library should be saved. In theory, the selected Datastore does not have to be assigned to the vSphere Cluster where we want to use the images later on. In reality, with network setup, firewalling & co, it would make life easier 😉
Validate and click FINISH.

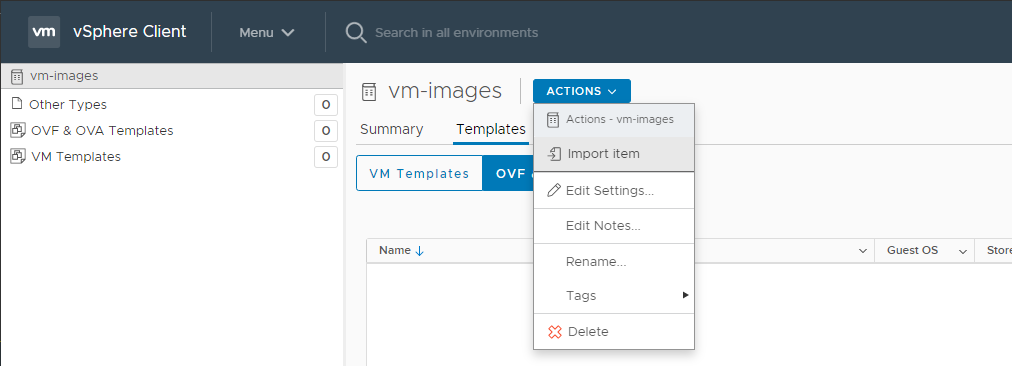
Next click on the newly created Content Library –> Actions –> Import Item
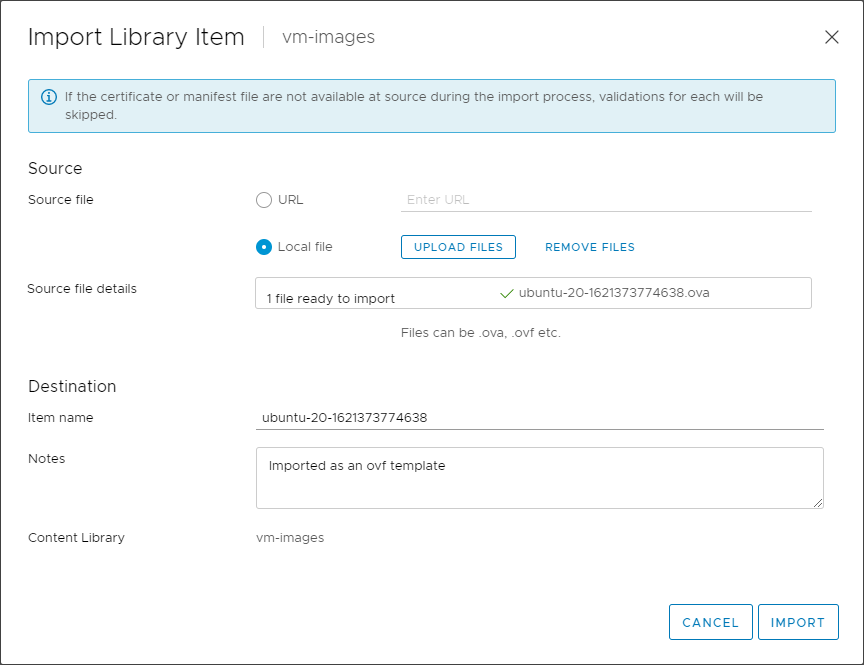
Select “Local file”, click on “Upload File” and select the image, you downloaded from the VMware Marketplace (links above). In my case the Ubuntu image.
The Content Library is now ready. I will assign it later to a Namespace.
VM Classes
VM Classes are basically T-Shirt sizes for your VMs. You might have already used them for your Tanzu Kubernetes Clusters. Both, your worker and control plane nodes have a class defined, which is exactly this. So VM Classes have been there from the very beginning. The difference now is, you can now modify them, create your own and define their accessibility per Namespace.
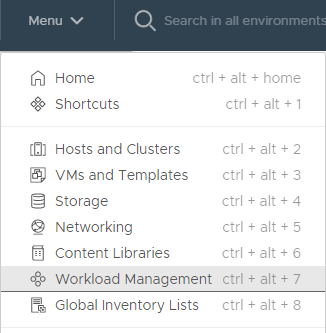
To modify them, navigate to your “Workload Management”
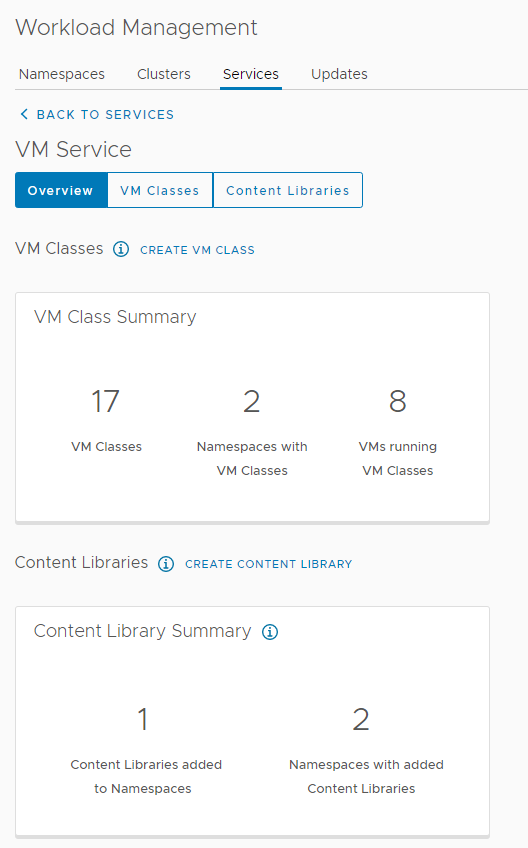
Next click on Services –> VM Services –> Manage

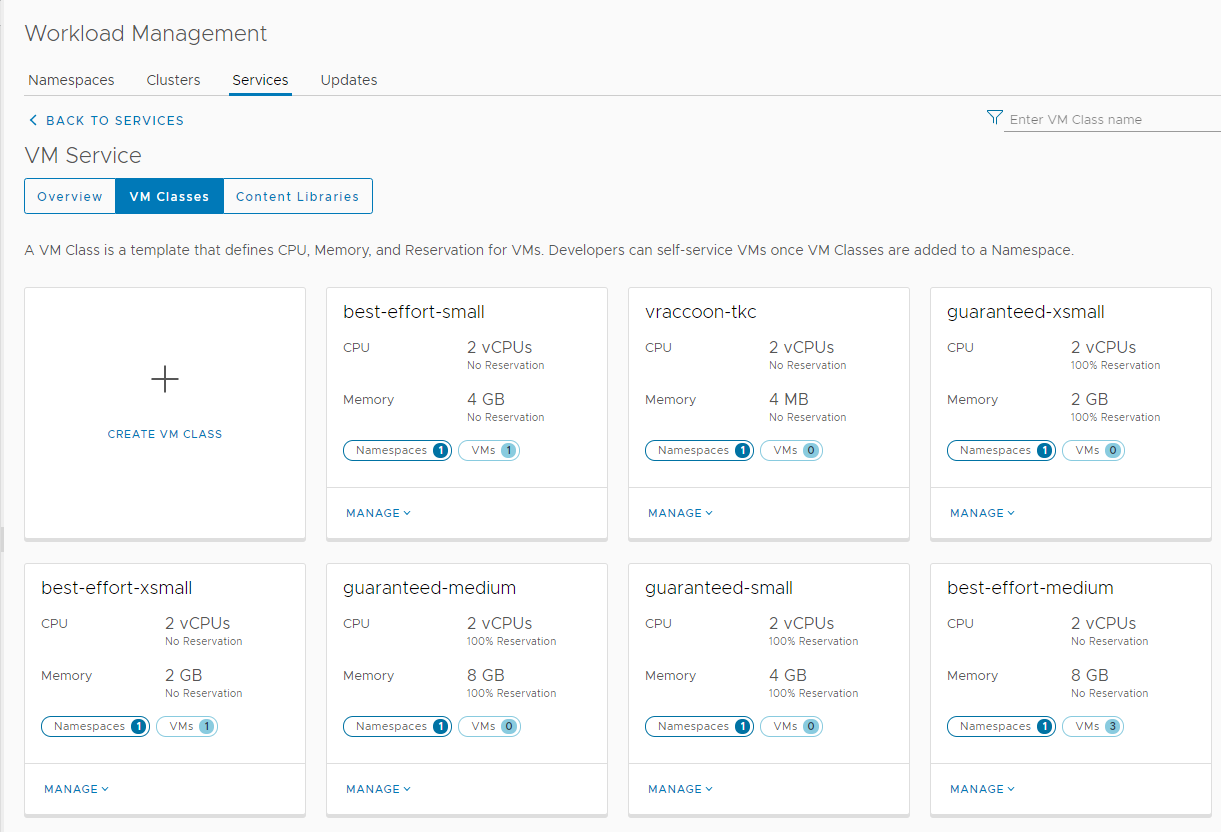
Here you’ll see some statistics around VM Classes. Click on VM Classes on the top.
On this page, you see all available VM Classes and to how many Namespaces they are assigned and if VMs already using this Class. You can also edit them or create your own. I think its mostly self-explanatory. The main difference is that the Classes starting with guaranteed are setting vSphere reservations, while the ones starting with best-effort do not.
Create Namespace
Create a new Namespace (or use an existing)
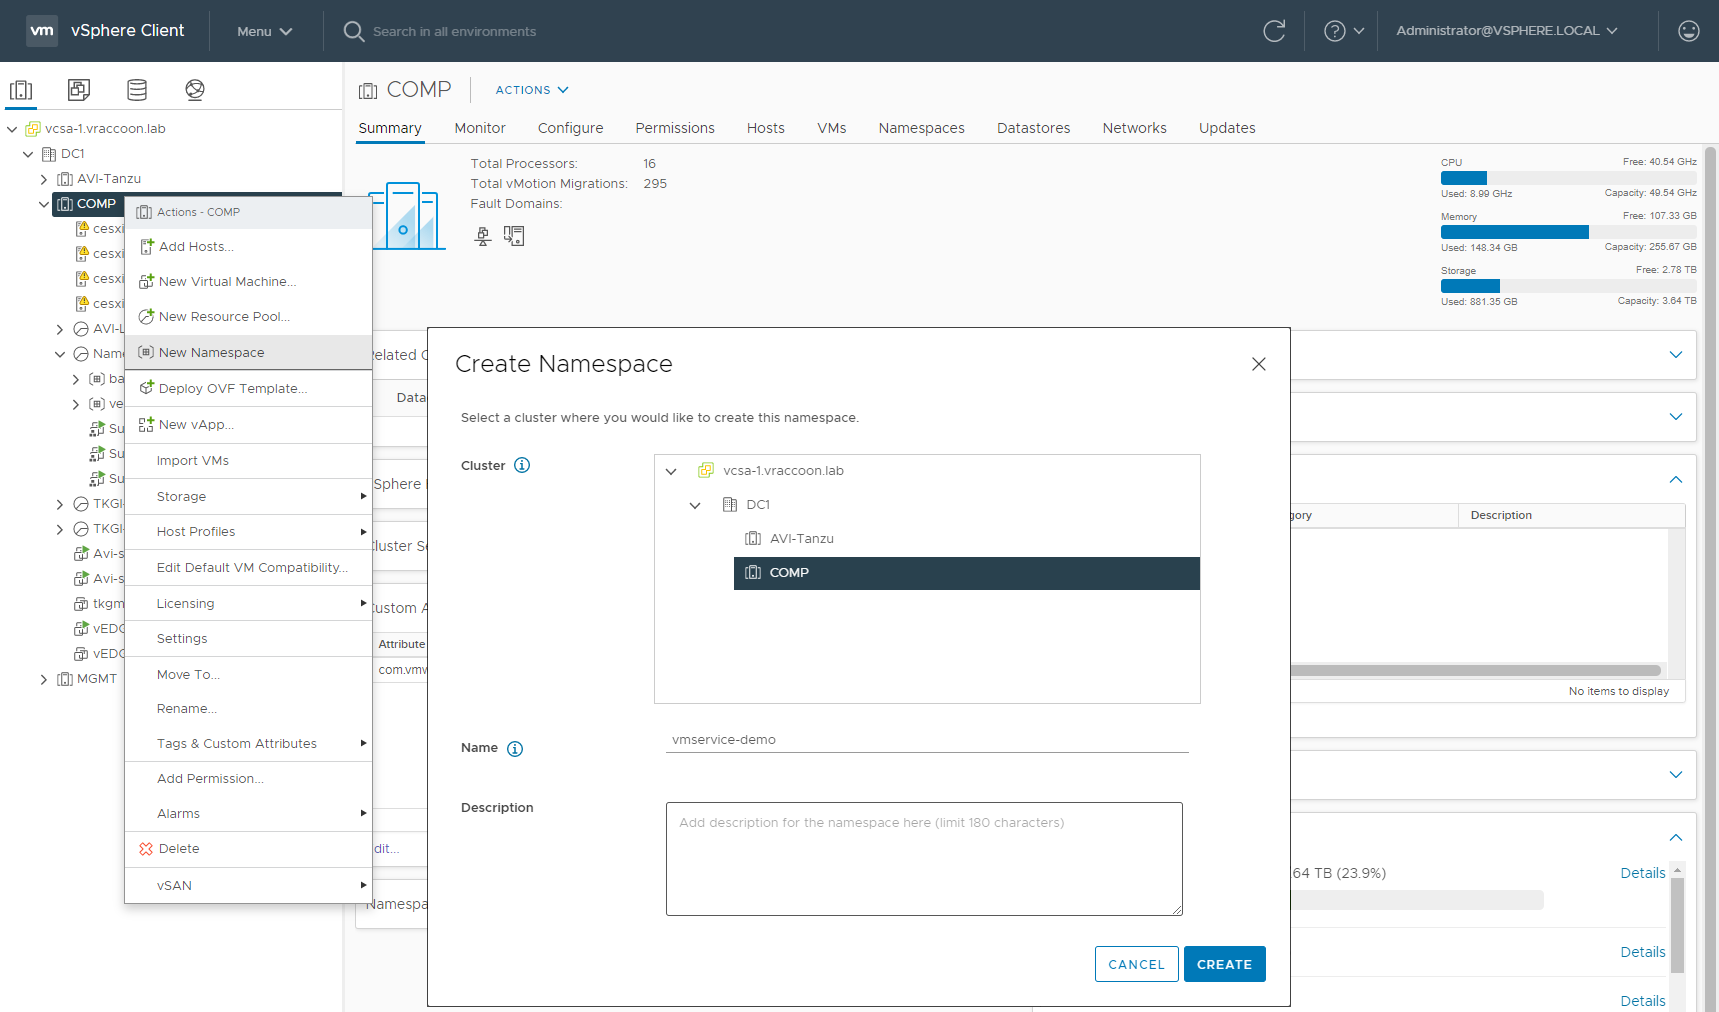
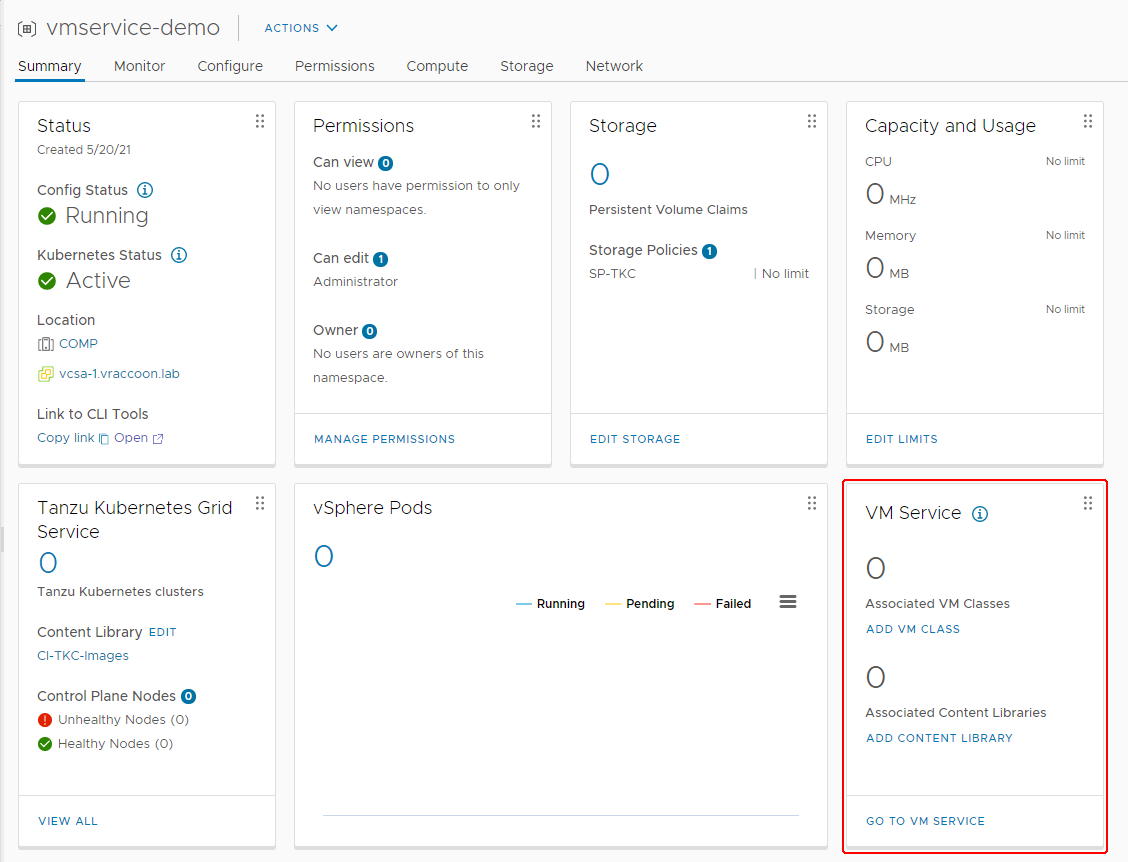
Assign a User with edit permissions and a Storage Policy. I’m using administrator@vsphere.local and the Storage Policy sp-tkc. You might notice, with vSphere 7U2a, there is a new tile called VM Services. This is where we add the VM Classes and Content Library to this Namespace. Click on ADD VM CLASS first.
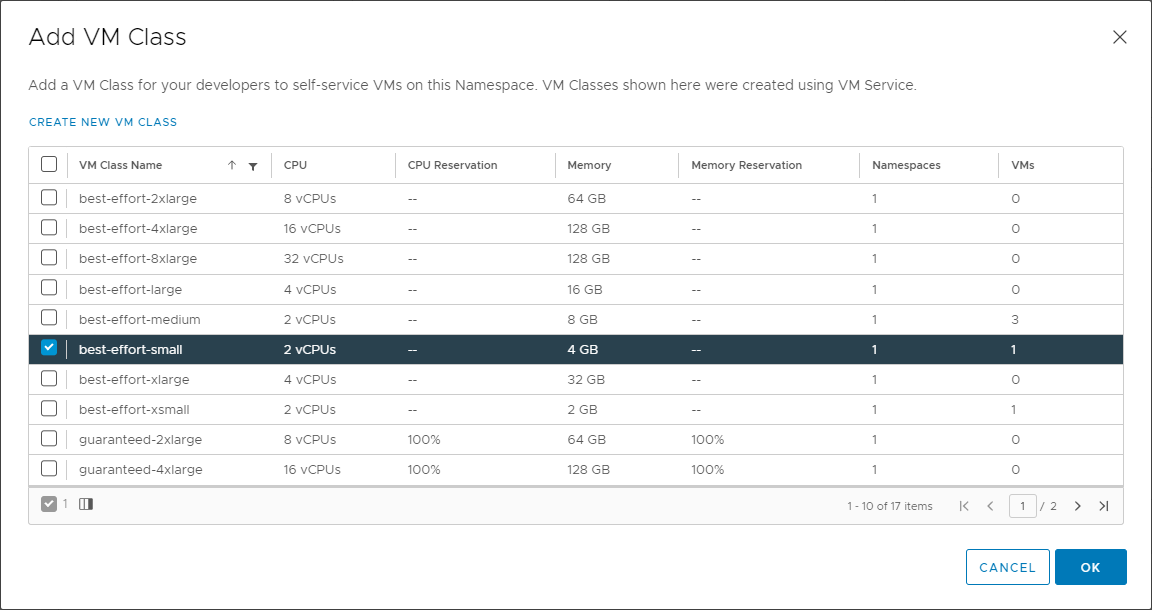
With checking the VM Classes, you allow them to be used in this particular Namespace. I’ll only allow only best-effort-small.
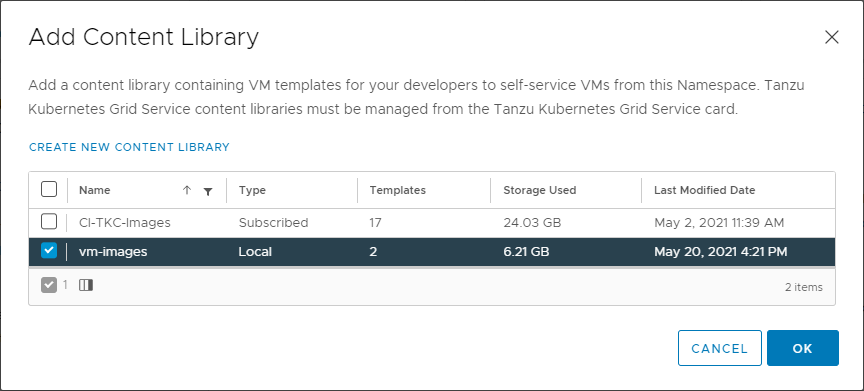
Next, click on ADD CONTENT LIBRARY and check the previously created Content Library.
We have finally finished the preparation. Now we can change gears and pretend to be the developer, who is using the K8s environment.
Create the Virtual Machine via K8s
Examinate the environment
First – Login to our Supervisor Cluster
vraccoon@ubu:~$ kubectl vsphere login --server 172.31.250.1 -u administrator@vsphere.local

You have access to the following contexts:
   172.31.250.1
   vmservice-demo

If the context you wish to use is not in this list, you may need to try
logging in again later, or contact your cluster administrator.

To change context, use `kubectl config use-context <workload name>`
Now, let’s check which VM Images and VM Classes are available.
vraccoon@ubu:~$ kubectl -n vmservice-demo get virtualmachineclass
NAME                CPU   MEMORY   AGE
best-effort-small   2     4Gi      3h30m

vraccoon@ubu:~/vms$ kubectl get virtualmachineimages.vmoperator.vmware.com
NAME                                                         VERSION                           OSTYPE                FORMAT   AGE
ob-18035534-photon-3-k8s-v1.19.7---vmware.1-tkg.2.f52f85a    v1.19.7+vmware.1-tkg.2.f52f85a    vmwarePhoton64Guest   ovf      3h15m
ob-18037317-photon-3-k8s-v1.20.2---vmware.1-tkg.2.3e10706    v1.20.2+vmware.1-tkg.2.3e10706    vmwarePhoton64Guest   ovf      3h15m
ubuntu-20-1621373774638                                                                        ubuntu64Guest         ovf      3h6m
As you might have noticed, there are a few more images available. They are coming from my other Content Library which contains the TKC Images.
Create VM YAML
Following a very basic YAML, which defines a VM (and really not more):
apiVersion: vmoperator.vmware.com/v1alpha1
kind: VirtualMachine
metadata:
  name: ubu-1
  namespace: vmservice-demo
spec:
  networkInterfaces:
  - networkType: nsx-t
  className: best-effort-small
  imageName: ubuntu-20-1621373774638
  powerState: poweredOn
  storageClass: sp-tkc
I believe, most of it is pretty straight forward, but let’s go through it line by line.
Line 1-2 – Simply the API Version and object kind
Lines 3-5 – the name of our VM and the Namespace, where to put it
Lines 7-8 – Since I’m using NSX-T, there is not much to do here. Simply put “nsx-t” as networkType and let it do the magic. If you are using HAProxy or AVI ALB, you would also need to define the network. In that case it would look similar to:
networkInterfaces:
 - networkName: "wld-1"
   networkType: vsphere-distributed
To identify existing networks, you can run “kubectl get network”.
Note, if you run this command in an NSX-T environment it would fail with the following:
vraccoon@ubu:~$ kubectl get network
Error from server (Forbidden): networks.netoperator.vmware.com is forbidden: User "sso:Administrator@vsphere.local" cannot list resource "networks" in API group "netoperator.vmware.com" in the namespace "backend"
This is expected. NSX-T will create the network (as an NSX-T Segment) automatically on demand, while AVI & HAProxy Setups expect them to be available.
Line 9 – The VM Class in which the VM should be provisioned. It has to be available in the Namespace.
Line 10 – The actual image within the Content Library created earlier.
Line 11 – The PowerState
Line 12 – The Storage Class, where to store the VM. If you set it to poweredOff, it will not power on at all – so in case you’ve set up some cloud-init config, it would not run.
Now we can finally create the Virtual Machine.
vraccoon@ubu:~$ kubectl create -f ubu-1.yaml
virtualmachine.vmoperator.vmware.com/ubu-1 created
Monitor the state of the VM
vraccoon@ubu:~$ kubectl get vm -o wide
NAME    POWERSTATE   CLASS               IMAGE                     AGE
ubu-1                best-effort-small   ubuntu-20-1621373774638   19s

vraccoon@ubu:~/vms$ kubectl get vm ubu-1 -o jsonpath='{.status}' | jq
{
  "biosUUID": "4226152f-e91a-bd49-4205-82394b1c5f68",
  "changeBlockTracking": false,
  "conditions": [
    {
      "lastTransitionTime": "2021-05-20T17:41:25Z",
      "status": "True",
      "type": "VirtualMachinePrereqReady"
    }
  ],
  "host": "cesxi3.vraccoon.lab",
  "instanceUUID": "5026a69d-f966-2eaf-6bfc-166180afe4fe",
  "phase": "Created",
  "powerState": "poweredOn",
  "uniqueID": "vm-17035",
  "vmIp": "10.244.0.98"
}
The VM will eventually get an IP. This is, when it’s ready.
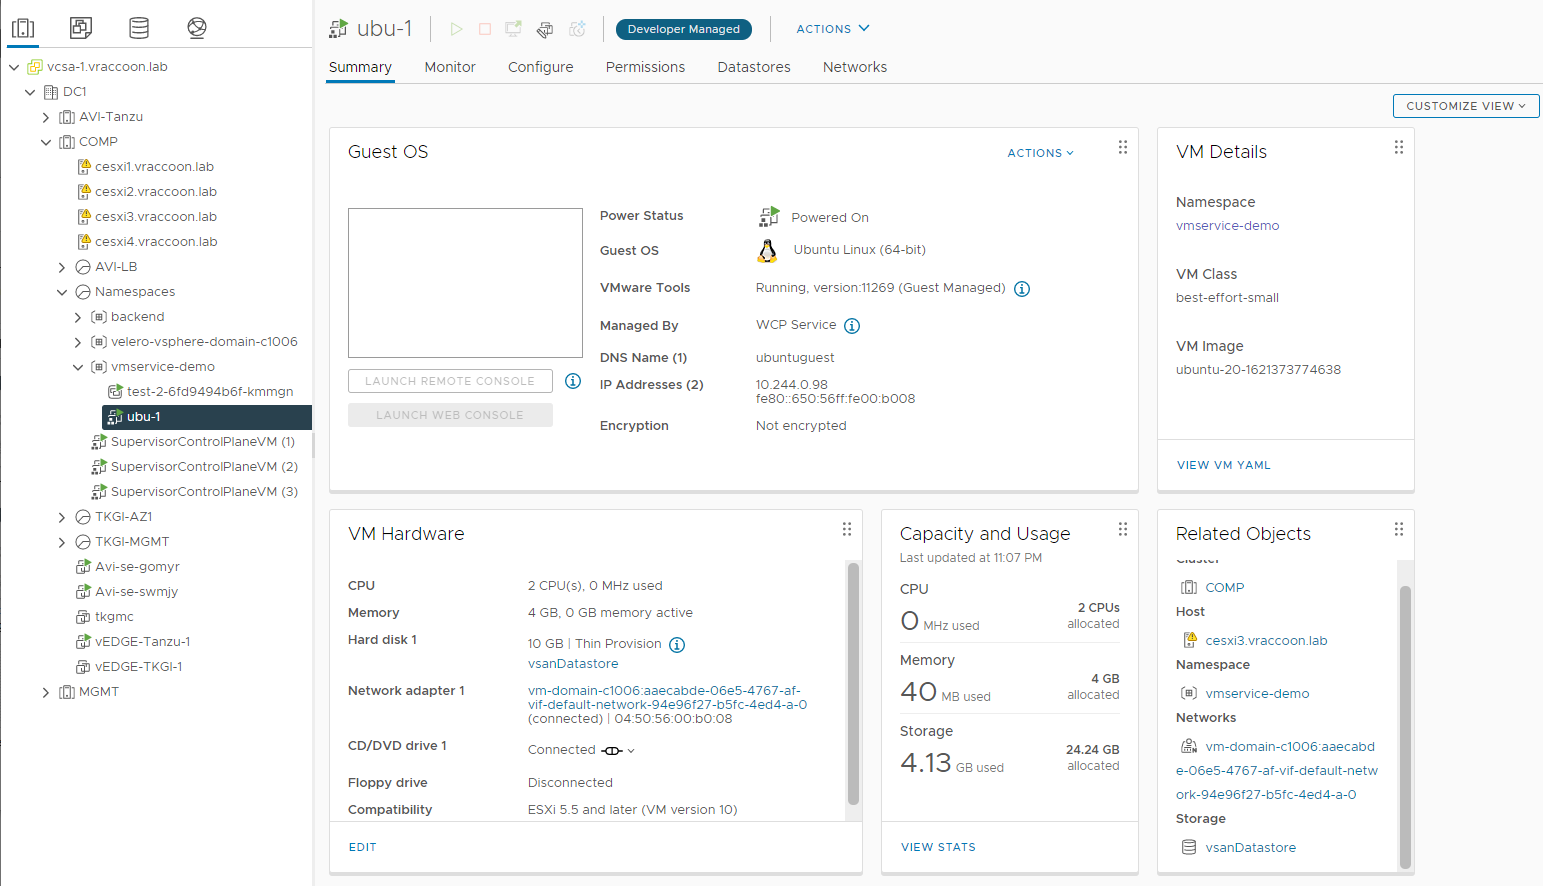
Even in vSphere, you can tell that this VM was provisioned through K8s API. Therefor it got the Developer Managed Flag. Because of this, access to this VM from vSphere is limited.
So, from Kubernetes/vSphere perspective, the VM deployment has finished successfully. Though, the VM is pretty useless to us. This is where cloud-init comes into play, to install something useful onto it.
Bonus – Virtual Machine Service (aka LoadBalancer)
In HAProxy/AVI Setups, the networks are plain vSphere networks, which means the VMs get IP straight from a traditional Subnet associated to the individual workload network.
In NSX-T environment, this is different – the VM is sitting inside a NSX-T Segment.
So how can you actually reach the VM? Manually creating NAT and Routing entries? I hope not xD
Kubernetes to the rescue! There is a thing called VirtualMachineService. As you know, “Services” in K8s are constructs related to networking. Hence, a VirtualMachineService is basically a LoadBalancer Service but for VMs. Just like the Service (type=LoadBalancer) is for Pods. In fact, the VMService sits on top of a traditional Service. This means, it is not only used to reach your NSX-T based VMs, but also to provide LoadBalancer Service to multiple VMs like a Database Cluster or similar (no matter whether in NSX-T or HAProxy/AVI Setups).
Create a Virtual Machine Service
The VMService identifies its endpoints (=VMs) by labels. Since my demo VM does not have a label, I need to add one.
vraccoon@ubu:~$ kubectl label vm ubu-1 env=demo
virtualmachine.vmoperator.vmware.com/ubu-1 labeled
Now we can create the VMService YAML
apiVersion: vmoperator.vmware.com/v1alpha1
kind: VirtualMachineService
metadata:
  name: svc-ubu-1
  namespace: vmservice-demo
spec:
  selector:
    env: demo
  type: LoadBalancer
  ports:
  - name: ssh
    port: 22
    protocol: TCP
    targetPort: 22
One again, actually pretty straight forward and for those of you, and very familiar to K8s Services. Most important are the following lines:
Line 7-8 – Every VM with this label (env=demo) will be set as member to this LoadBalancer.
Line 12 – Defines the front-facing port of the LoadBalancer, the one where you will connect to.
Line 14 – Defines the Port, on which the VMs (member server) are listening, thus where the LoadBalancer will sent the traffic to.
Let’s check which IP we got:
vraccoon@ubu:~$ kubectl get svc
NAME        TYPE           CLUSTER-IP   EXTERNAL-IP    PORT(S)        AGE
svc-ubu-1   LoadBalancer   10.96.0.77   172.31.250.5   22:30272/TCP   7m48s

vraccoon@ubu:~$ kubectl get vmservice  svc-ubu-1 -o jsonpath='{.status}' | jq
{
  "loadBalancer": {
    "ingress": [
      {
        "ip": "172.31.250.5"
      }
    ]
  }
}
Since the LoadBalancer Service is directing to the VM’s SSH Port, we can actually check if it works
vraccoon@ubu:~/vms$ ssh root@172.31.250.5
The authenticity of host '172.31.250.5 (172.31.250.5)' can't be established.
ECDSA key fingerprint is SHA256:ZbMlz3JWRQK1fmSTQVS1D+bJBEveQc3LnVbDIQ+VRec.
Are you sure you want to continue connecting (yes/no/[fingerprint])? yes
Warning: Permanently added '172.31.250.5' (ECDSA) to the list of known hosts.
root@172.31.250.5: Permission denied (publickey).
Obviously, there is an SSH daemon listening, but it requires a key to authenticate. Setting this key within our VM could be part of the cloud-init process, which we haven’t done. So this result was expected.