Deploy vSphere with Kubernetes (Project Pacific) – Part 7: Enable Workload Management
This Post is part of a series:
Deploy vSphere with Kubernetes (Project Pacific) – Part 1: Inventory and Design
Deploy vSphere with Kubernetes (Project Pacific) – Part 2: Prepare base networking
Deploy vSphere with Kubernetes (Project Pacific) – Part 3: Prepare base storage (FreeNAS)
Deploy vSphere with Kubernetes (Project Pacific) – Part 4: Install NSX-T
Deploy vSphere with Kubernetes (Project Pacific) – Part 5: Configure NSX-T
Deploy vSphere with Kubernetes (Project Pacific) – Part 6: Some basic testing
–> Deploy vSphere with Kubernetes (Project Pacific) – Part 7: Enable Workload Management
Deploy vSphere with Kubernetes (Project Pacific) – Part 8: Deploy first Workloads
Finally! We’ve come a long way, only to flip a few last switches, that will then do the actual magic!
Enable Workload Management
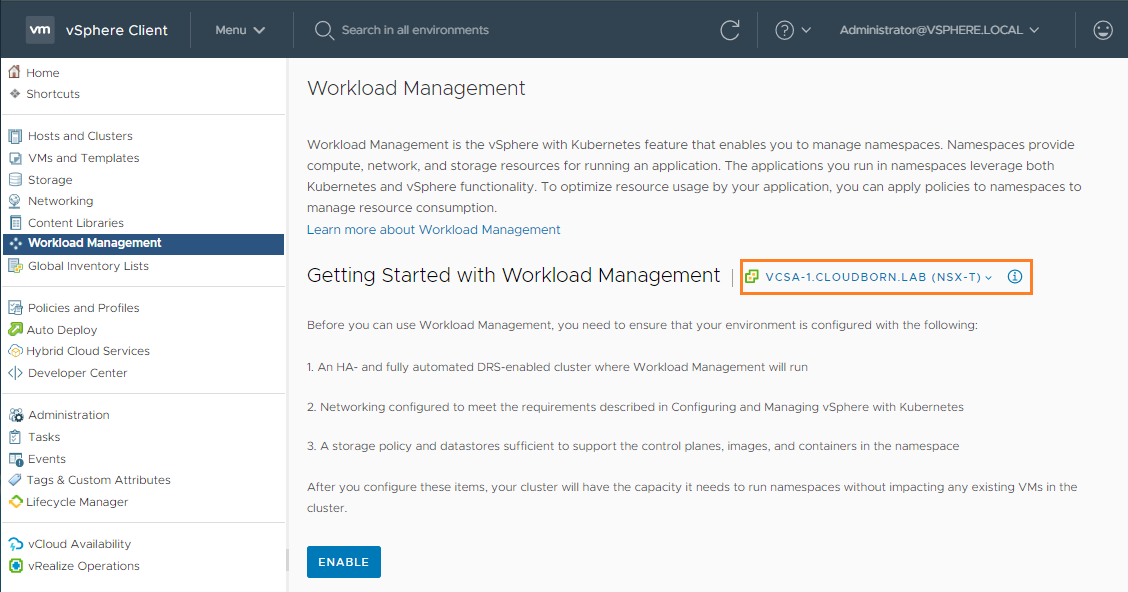
Go to your vCenter –> Menu –> Workload Management
You’ll see a rough listing of requirements.
1. HA & DRS enabled – I haven’t covered this in my series, its just enabled with default settings)
2. Networking configured – we’ve quite stressed this topic and kind of did it, not production-ready though)
3. Storage Policy – We configured a Storage Policy pretty much at the beginning
Let’s select our vCenter (in case it isn’t already) and hit ENABLE
On the next page, you should see the COMP Cluster listed under COMPATIBLE. If so, hit NEXT. If not, it’s time for troubleshooting 😉
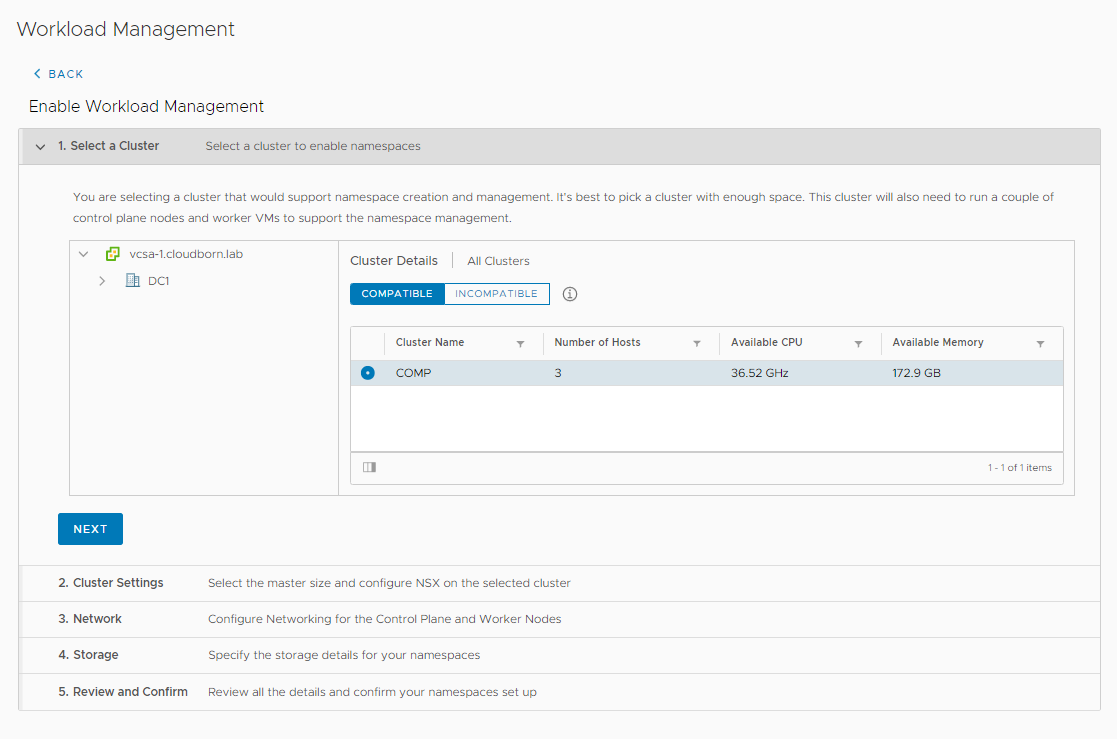
Choose a Control Plane size of Tiny. You can go bigger if you want, but if you exceed 1000 Pods in your Lab, we probably have a different understanding of the word “Lab” 😉

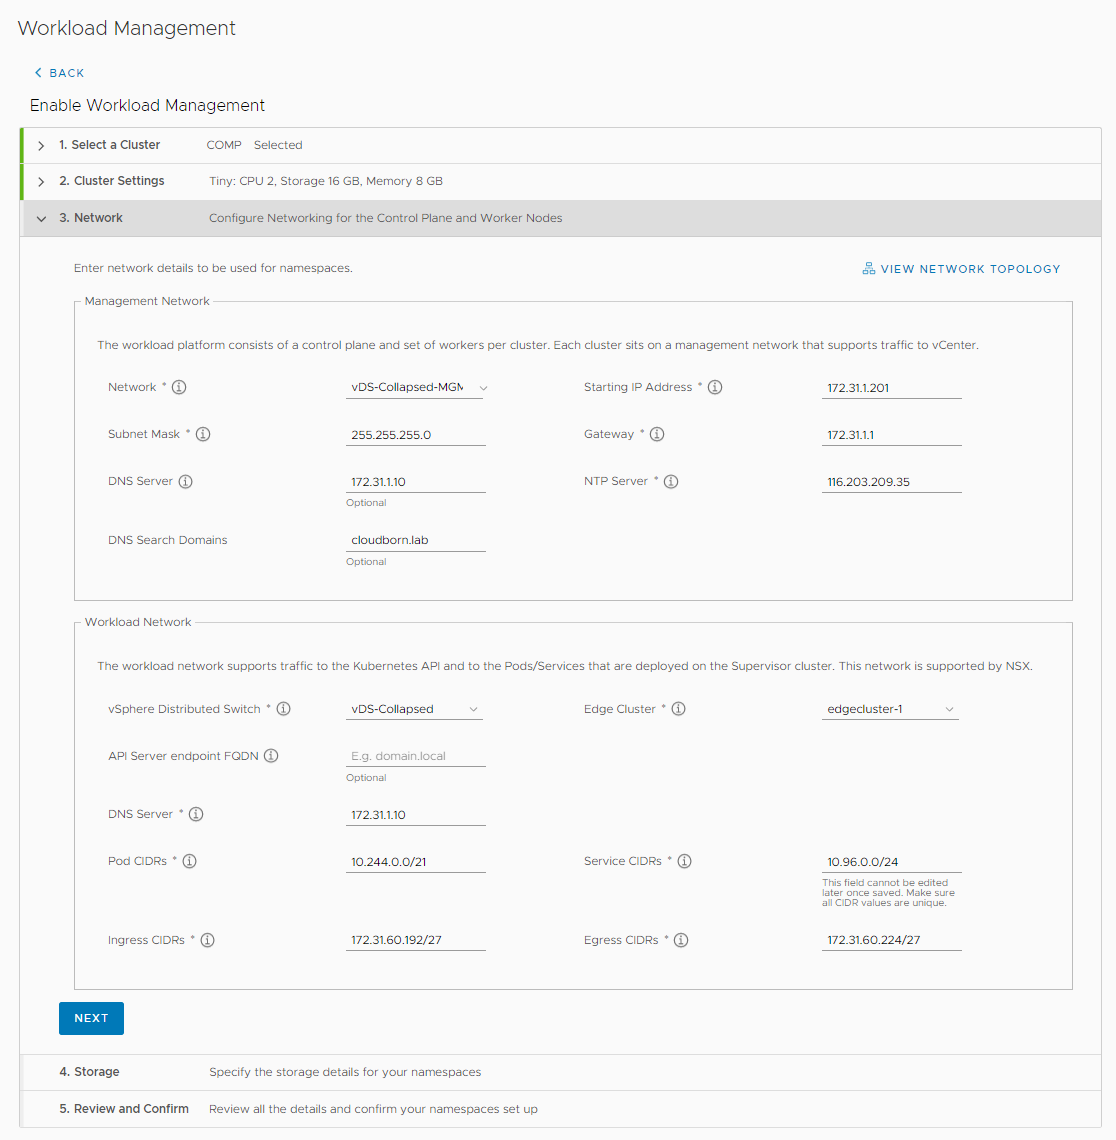
Next, we need to enter the network settings for our SupervisorControl Plane.
- Management Network
- Network: vDS-Collapsed-MGMT (vCenter & ESXi Hosts need to be reachable from here)
- Starting IP Address: 172.31.1.201 (K8s will use 5 IPs, starting from the one specified, 3 for the SCP VMs, 1 for the floating IP and 1 as buffer, e.g. for rolling upgrades)
- Subnet Mask: 255.255.255.0
- Gateway: 172.31.1.1
- DNS Server: 172.31.1.10
- NTP Server: 116.203.209.35 (just the IP of a valid NTP server)
- DNS Search Domains: cloudborn.lab
- Workload Network
- vSphere Distributed Switch: vDS-Collapsed (has to be the vDS, that also hosts the Overlay Networks –> the one, we’ve also chosen during NSX configuration)
- Edge Cluster: edgecluster-1
- API Server endpoint FQDN: < > (you can enter an FQDN that will be assigned to the Supervisor K8s endpoint. If you do so, remember to add a DNS entry too)
- DNS Server: 172.31.1.10
- POD CIDRs: 10.244.0.0/21 (default value, they must not overlap with any other network of the management components; if you plan to route the POD networks northbound, this network must not overlap with any other network in your datacenter)
- Service CIDRs: 10.96.0.0/24 (similar to POD CIDR, but for K8s Cluster IP Services)
- Ingress CIDRs: 172.31.60.192/27 (these IPs are used for ingress traffic and have to be part of the same network as the EDGE / T0 Uplinks – in our case, it is network 172.31.60.0/24 – we have to carve out a slice from it – /27 is the minimum)
- Egress CIDRSs: 172.31.60.224/27 (similar to Ingress CIDRs)
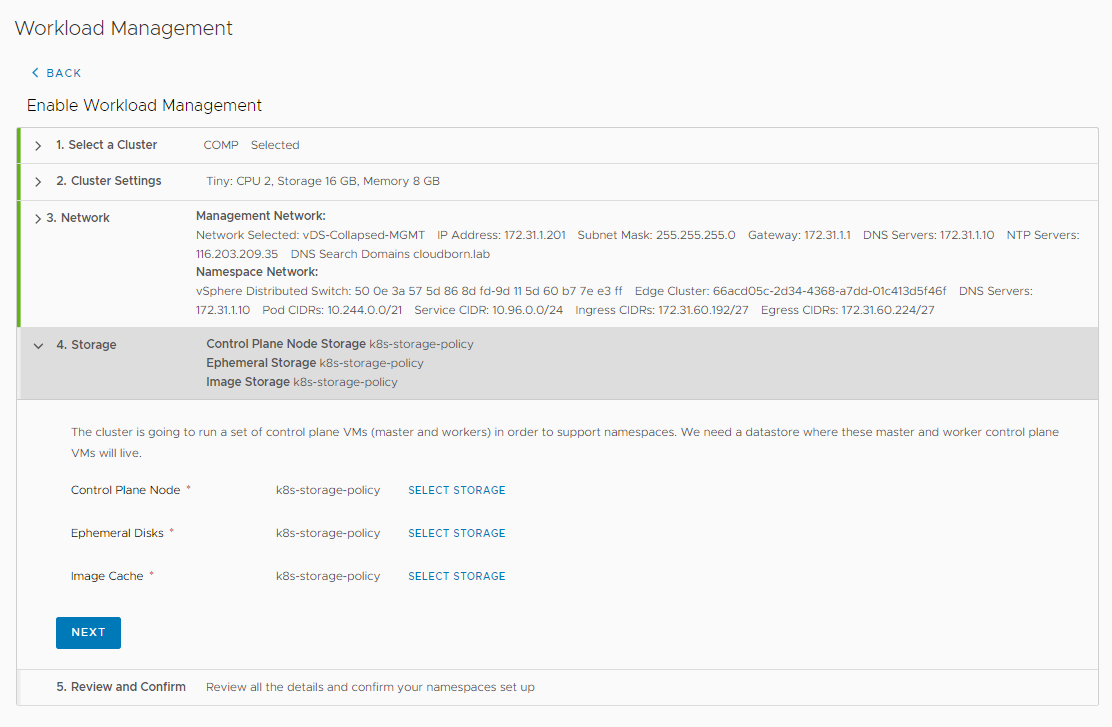
Now, the Storage Policy comes into play. Click SELECT STORAGE and select k8s-storage-policy for all of them.
Review and Confirm
My favorite screen – maybe we should go back to part 1 of this series and review everything =D
Or we just hit FINISH.

This takes a bit, so I’d say it’s clearly time for a beer!